I can't believe I haven't posted anything in so long but...what can you do? We've accomplished a few things on the house and I'll get some of that posted soon but I'm excited about my latest project and wanted to post it.
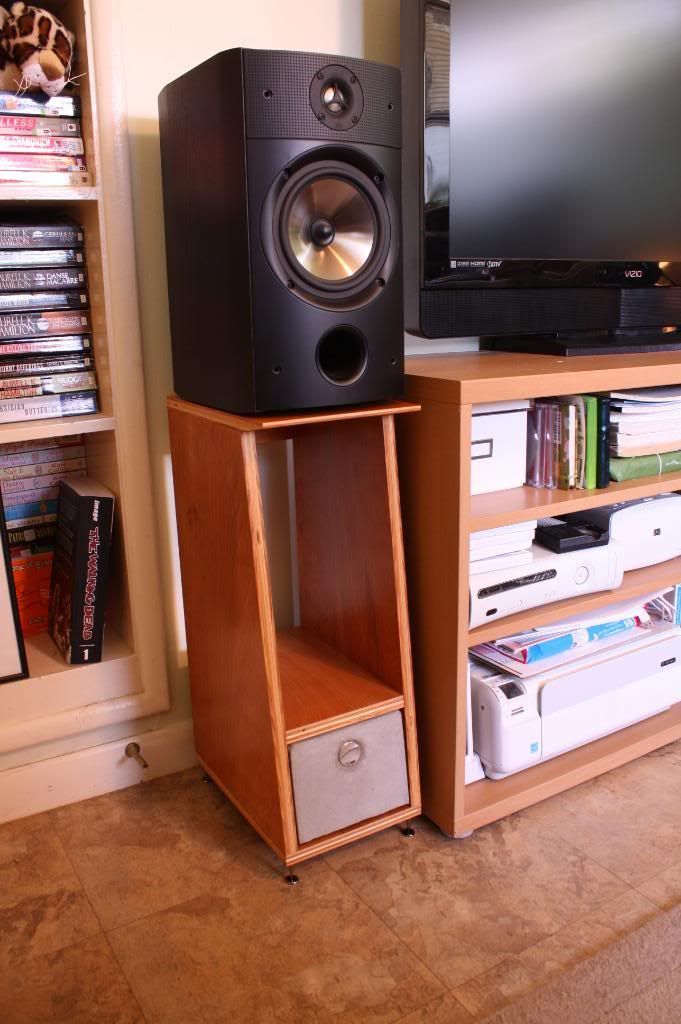
I have bookshelf speakers...so not the tall floor standing models and (I've read) it's important that the speakers be solidly "coupled" to the floor to get the best sound but I couldn't find any store bought speaker stands that I thought looked interesting. What else to do but make some? Most of the units available on the market are around $60 to $100 although if you are a 1 percenter, you can easily spend more than my system costs on stands alone. My goal was to stay under $100. In the end, I think I spent right at about $80...and $27 of that was the chrome feet.
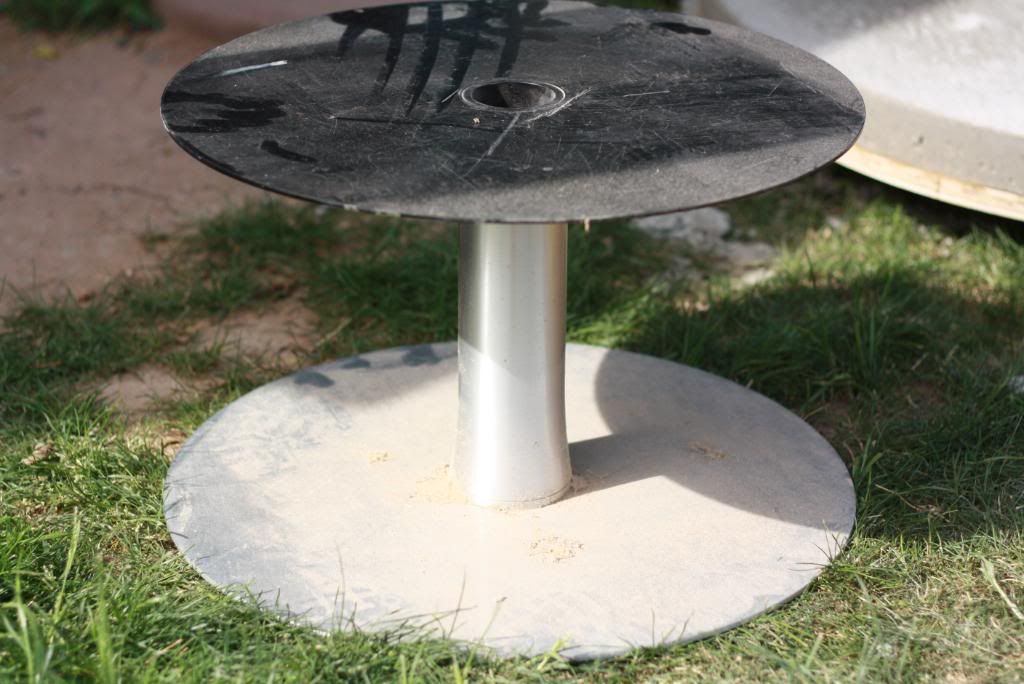
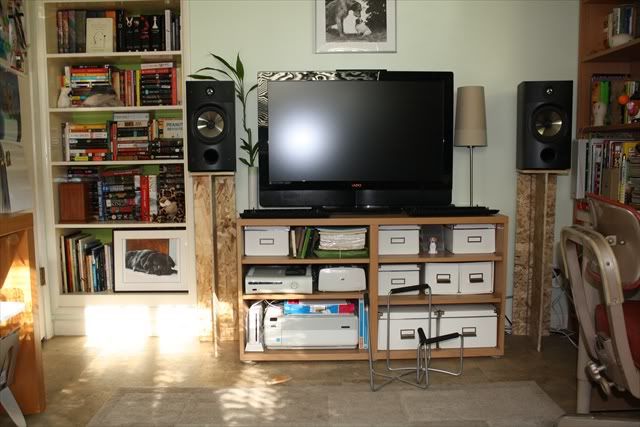
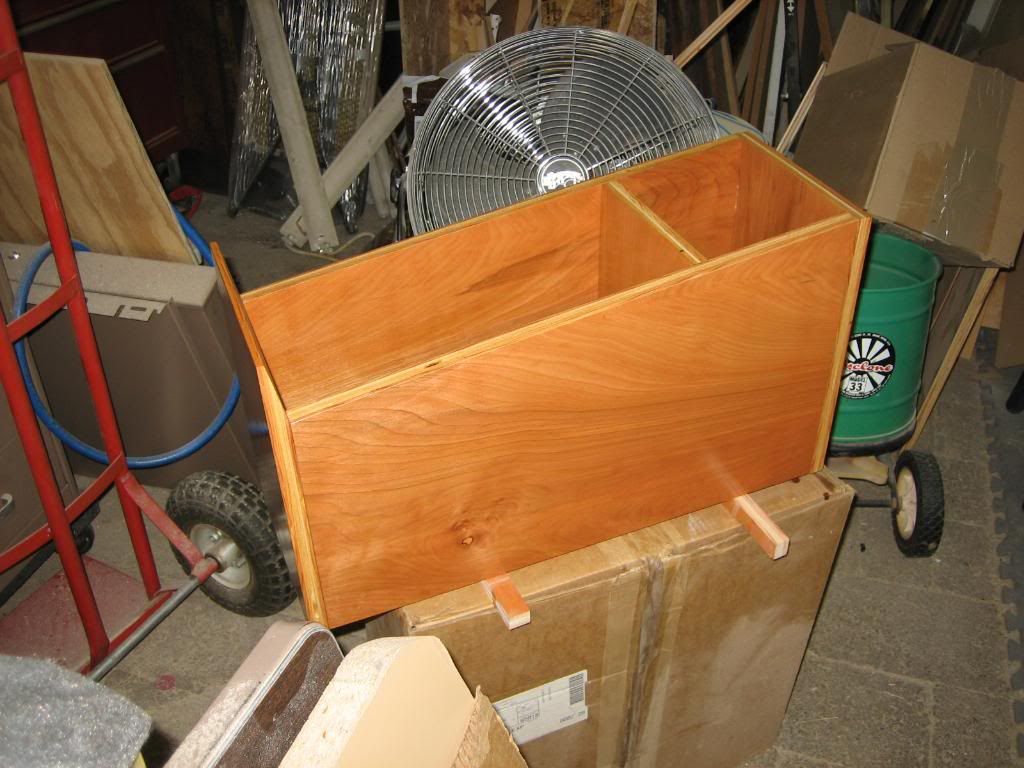
Enough blathering on about it...if you've been following along, you may have remembered this picture and the GF's displeasure with my OSB solution... Also, they weren't very stable and they were way too tall. The idea is to put the tweeter at ear level when you're in your favorite listening spot.
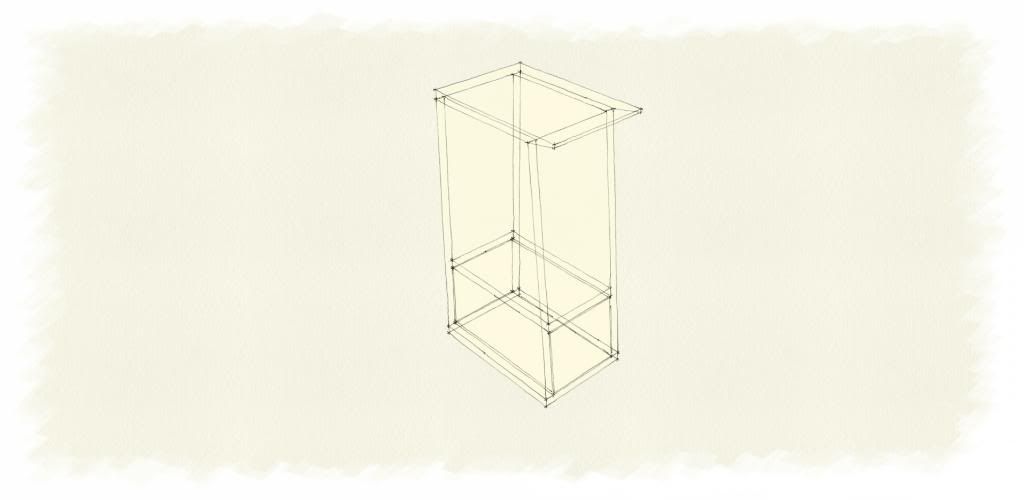
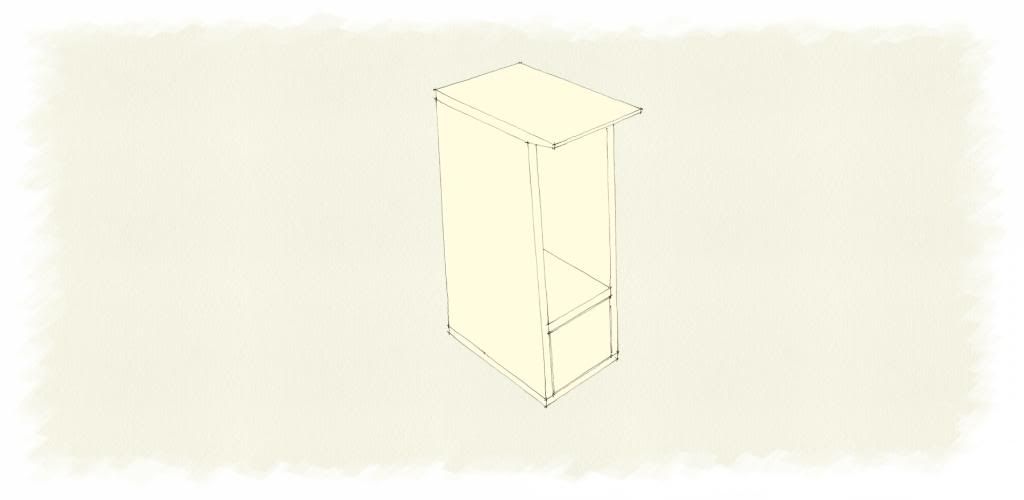
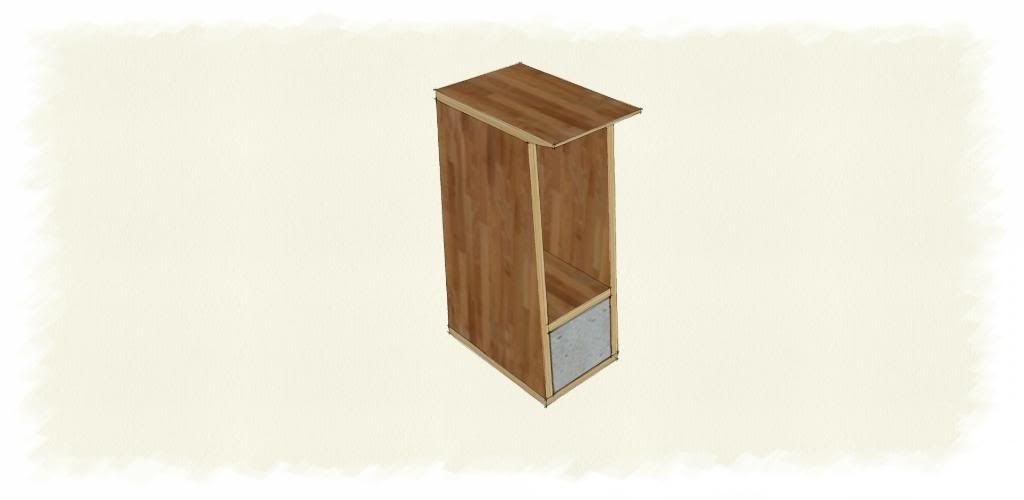
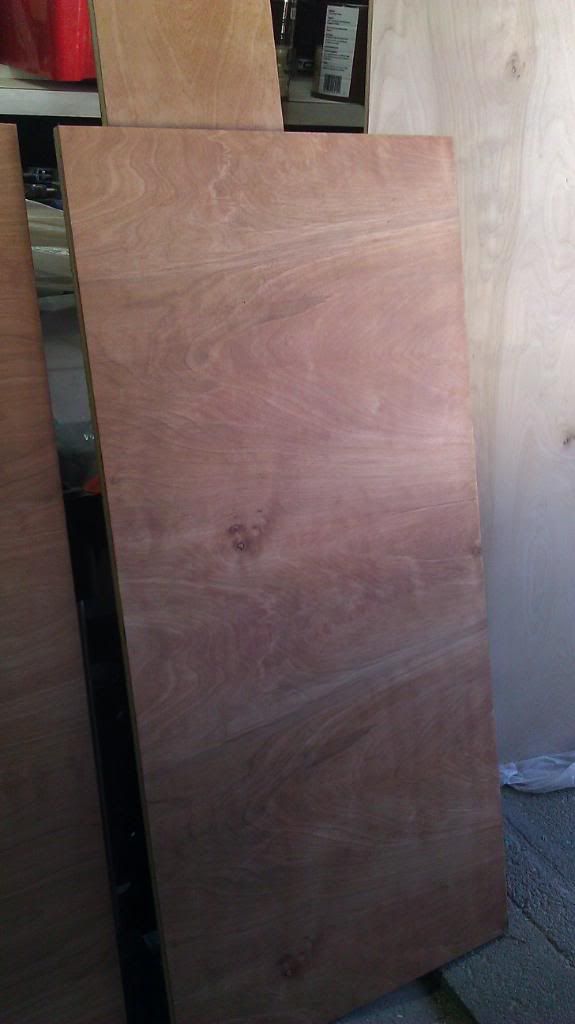
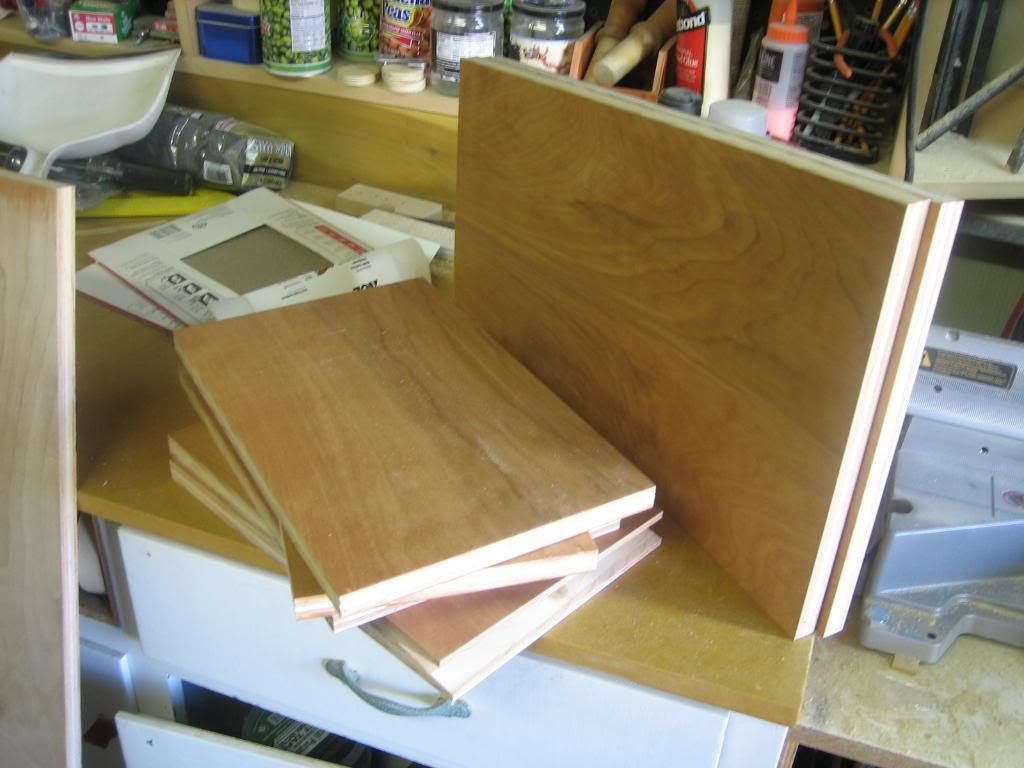
I designed the new, more relationship-friendly units in Google Sketchup. I'm a big fan of plywood and have other plywood projects around the house so the design is based on 3/4" birch plywood with, of course, the edges exposed. I had about half a 4x8 sheet leftover from something else so it was basically free but for budgeting, a whole sheet is about $45 so say it's $25 worth of wood.
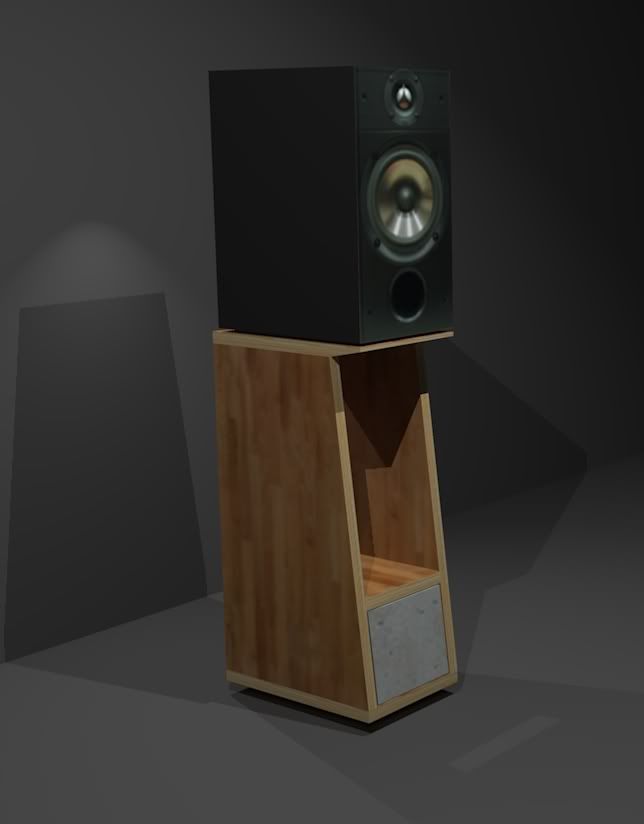
And here is a rendered version...I actually found the speaker already modeled...it's pretty basic but I didn't have to spend any time on it. Pictures of the completed stands are at the end of this post.
Jump to finished pictures. Note, you can double click on any image to see it full size.
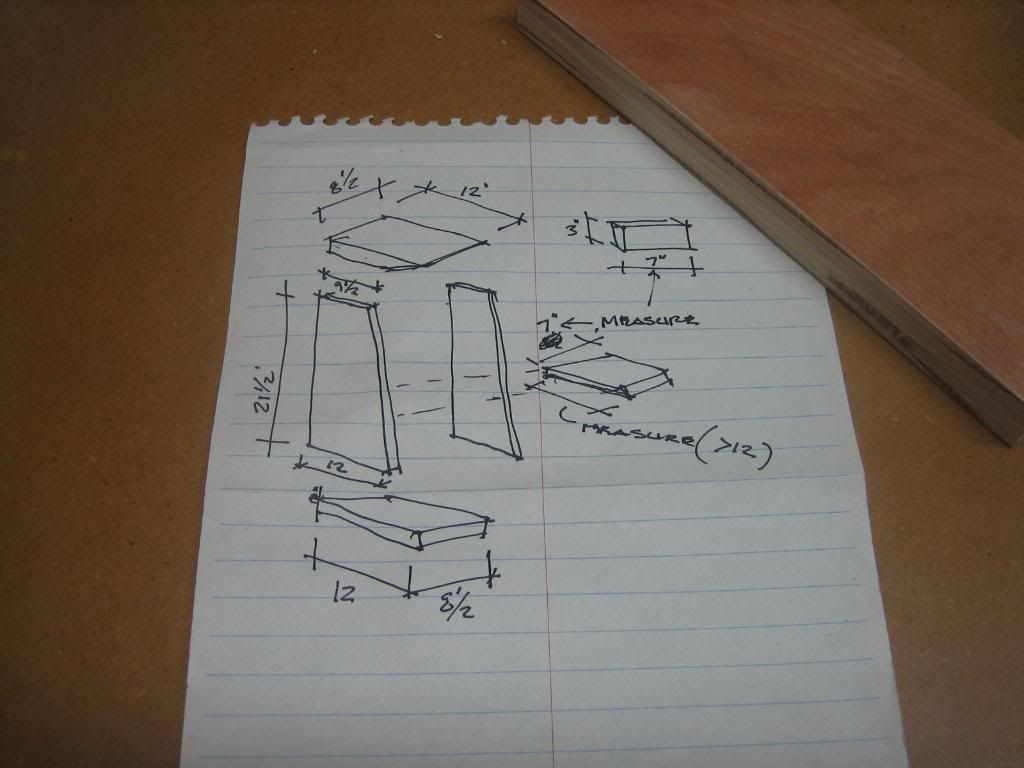
With that, I set about building them. Here's the simple cut plan I created.
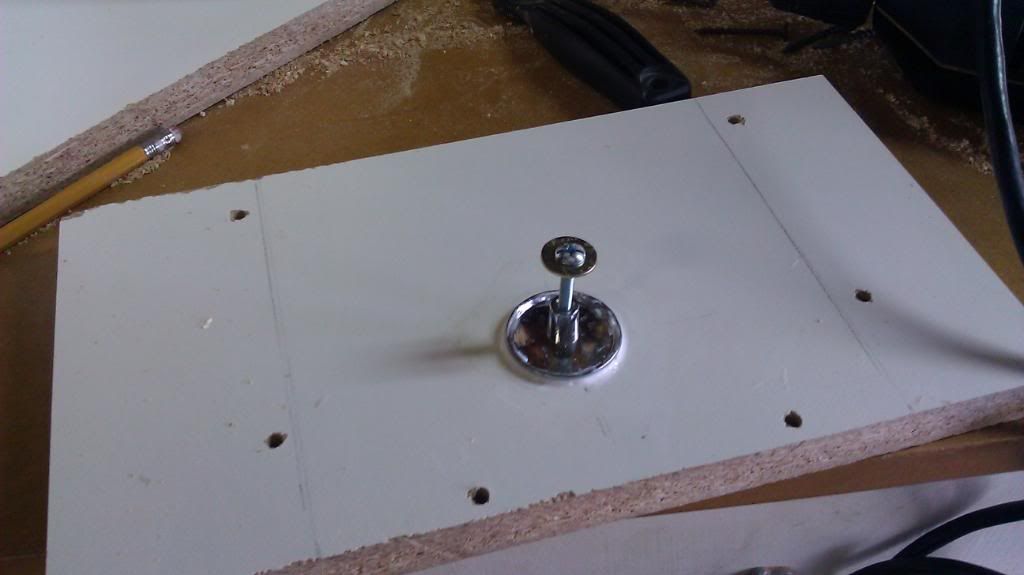
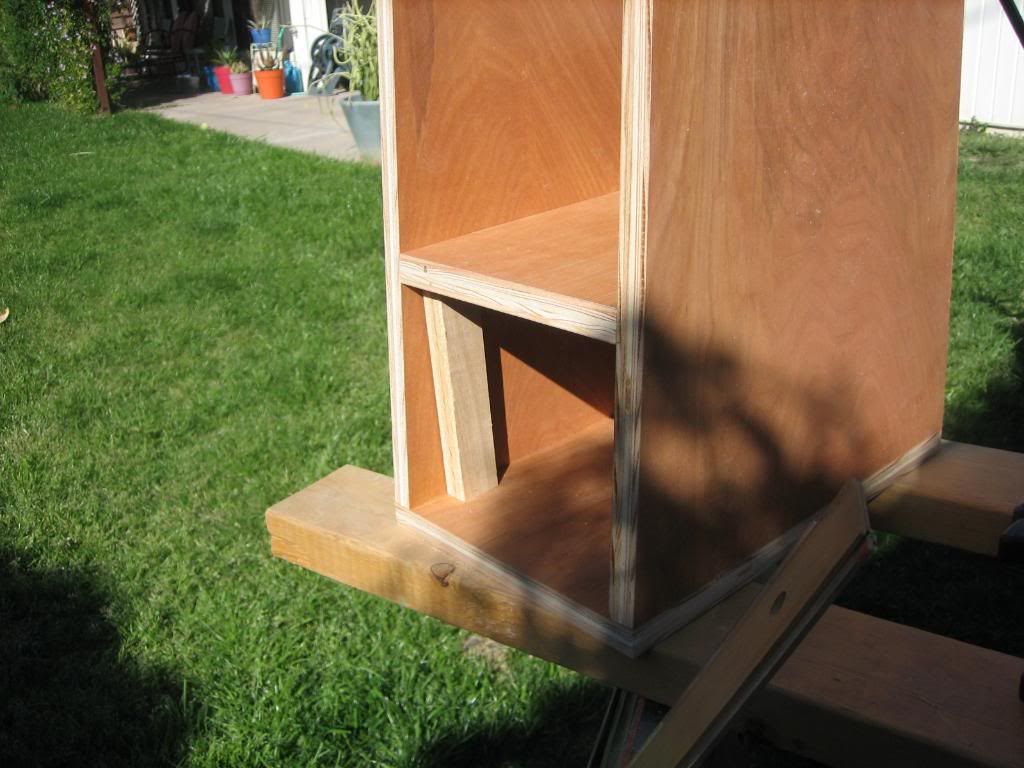
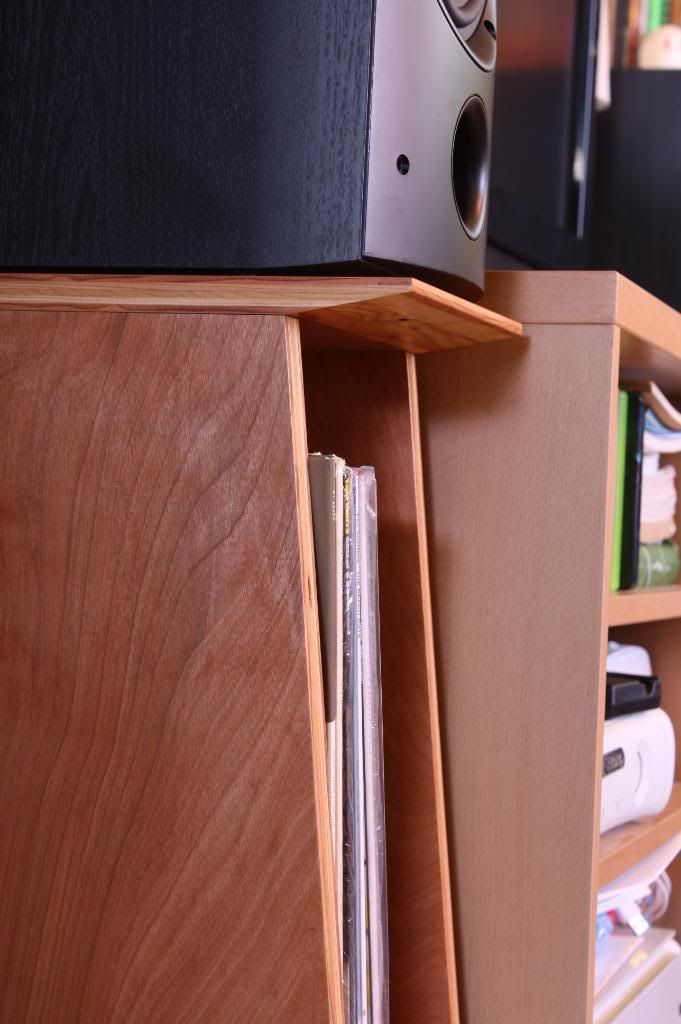
I increased the 12" dimension to 12 1/2" so that I could use the space in the middle to serve as overflow LP storage as I've tentatively gotten back into vinyl (record player, people...I have a record player) and I don't have much storage space. I determined I wanted the stands about 24" high and I figured on the feet being 1". The feet are actually 1 5/16"...so I'm over. No big deal as I wasn't matching up to anything...just trying to put the tweeters at ear level.
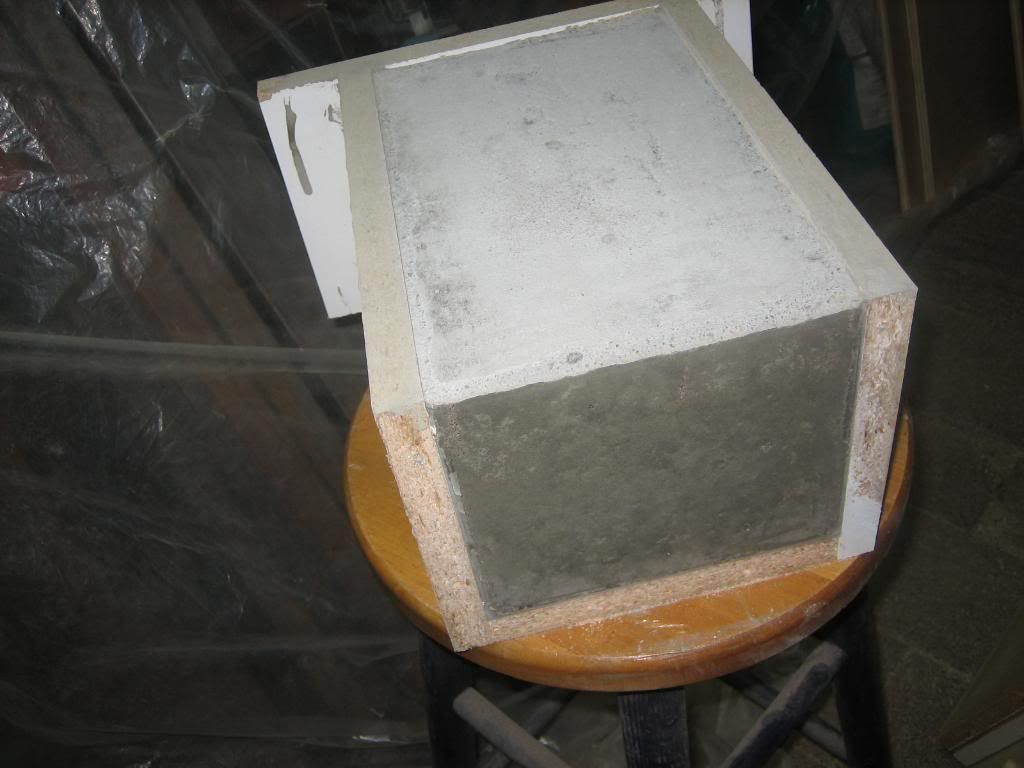
In order to create a low center of gravity as well as provide weight to "couple" it to the floor, I incorporated a solid block of concrete at the bottom that I would have to cast. Since this would take time to dry, I started on it first. I've cast a couple of concrete items before and I've always wanted to try imbedding something in the concrete so I took this opportunity to do so. I bought simple retro drawer pull knobs that are the same as we've installed in our hall bathroom. Dirt cheap, too...about $1.50 each, I think. $8.50 for the melamine shelf I bought to make the form. I could only get one form out of it and although I could have found enough scrap to make a second one, I thought it would be good to do a test in case it didn't work.
I put the knob's included screw in and added a nut and washer to give the concrete something to wrap around and hold it in so it doesn't pop out. The knob is held in place on the form with caulk.
Once screwed together, I caulked all the edges and let it dry for about an hour. Then I mixed and poured the concrete.
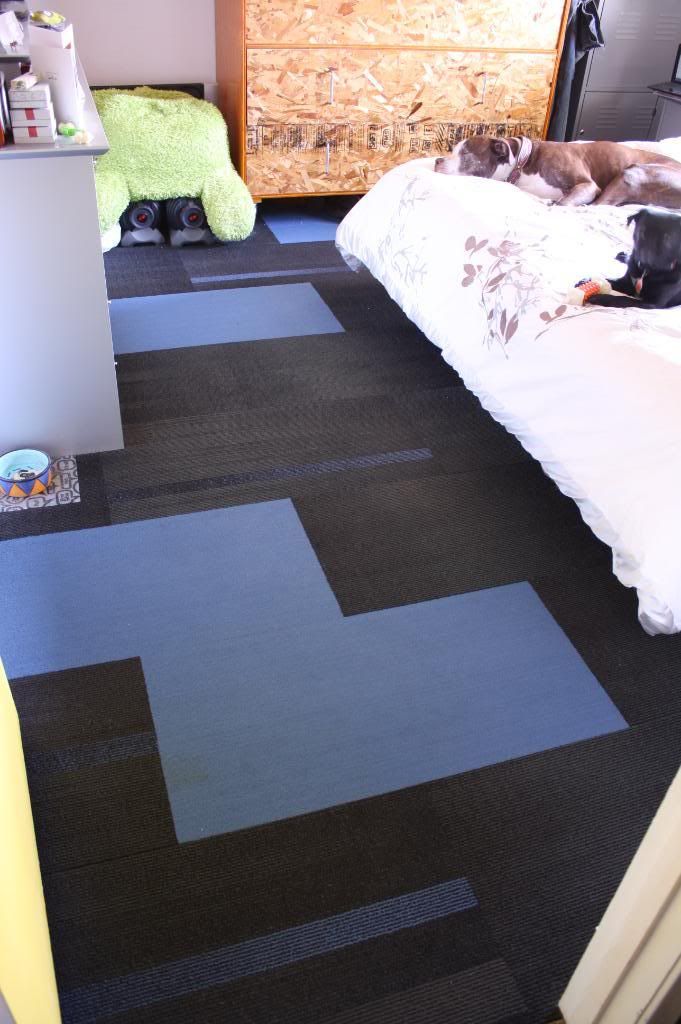
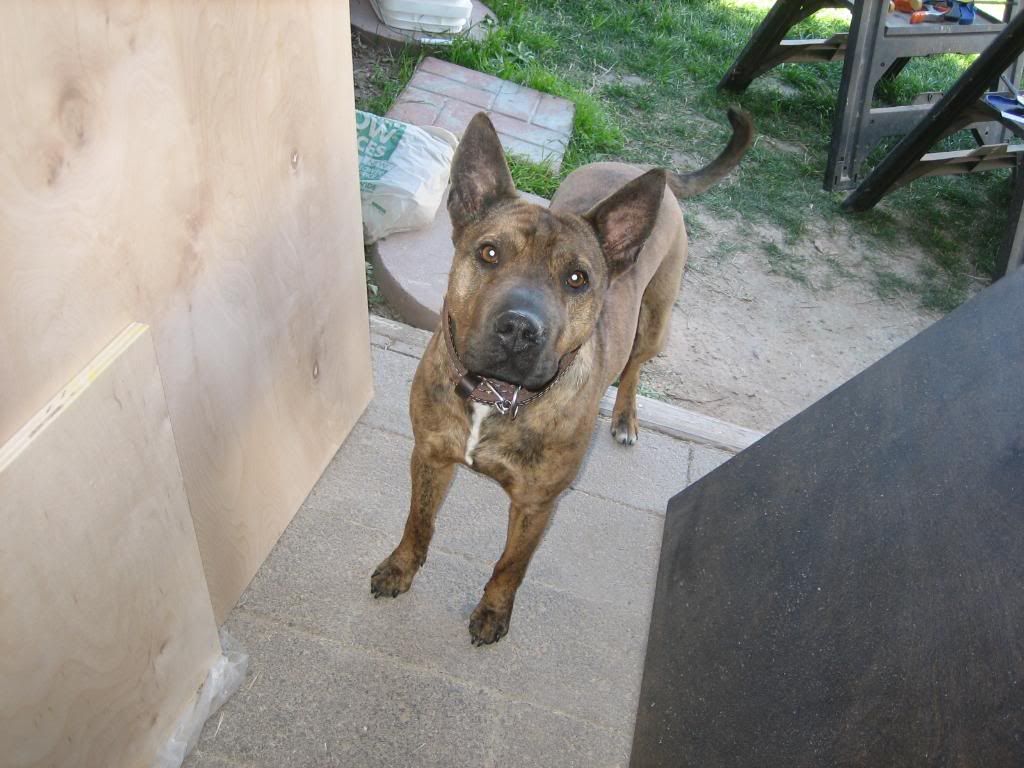
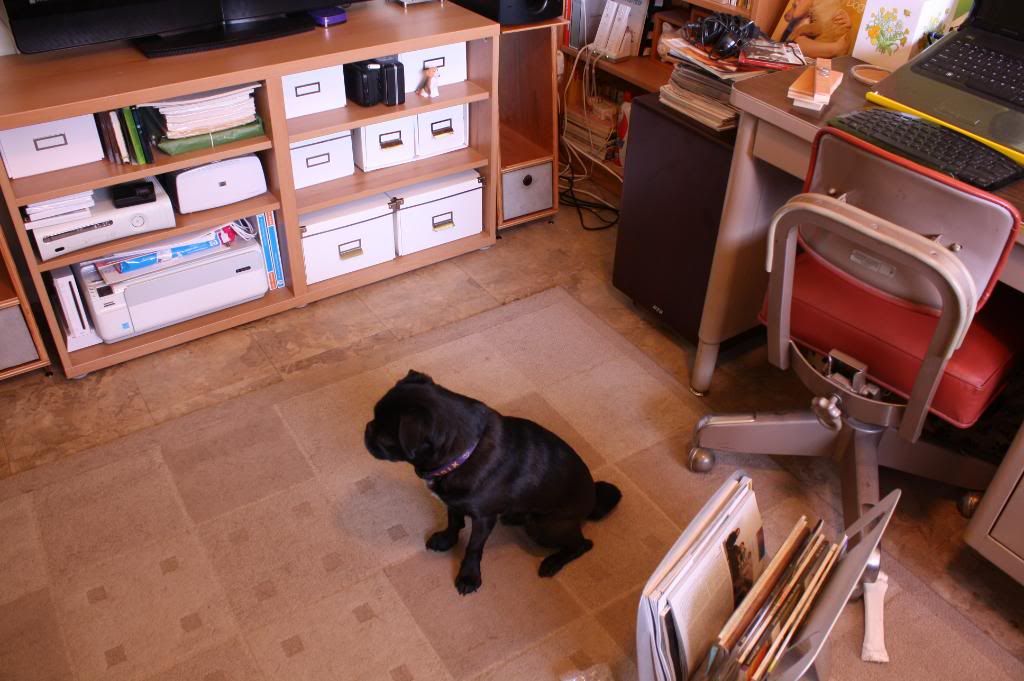
Here's Gomer-dog providing quality control:
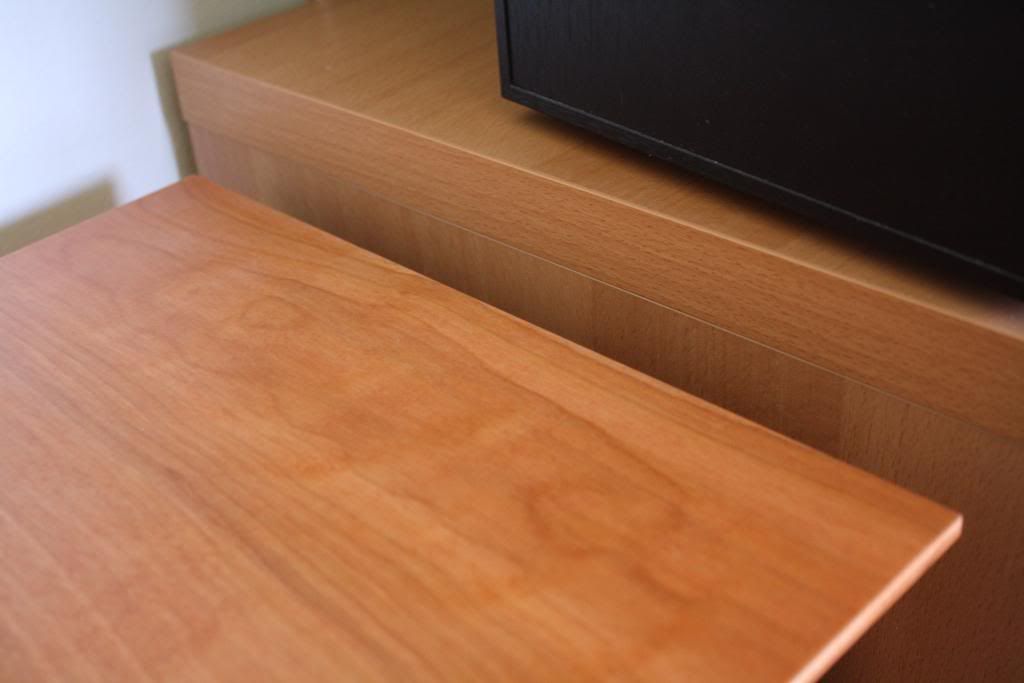
In the office that doubles as my "listening room" (can't be a proper audiophile without a listening room), all the furniture except our classic tanker desk is beech wood, which is orangish in color. I have a makeshift...er, stand for the stereo equipment that is made from a similar piece of birch plywood and it rests on a piece of beech furniture and illustrates how much lighter the birch is than the beech.
To remedy this I knew I would have to stain the wood but I liked the lighter edges as illustrated in the rendering above so my genius plan was to stain the wood first, then cut the pieces so the edges would be fresh and not stained. This caused me to have to be a lot more anal about the handling of the wood and didn't really gain much in the end so I won't do that again but below are the pieces I stained first.
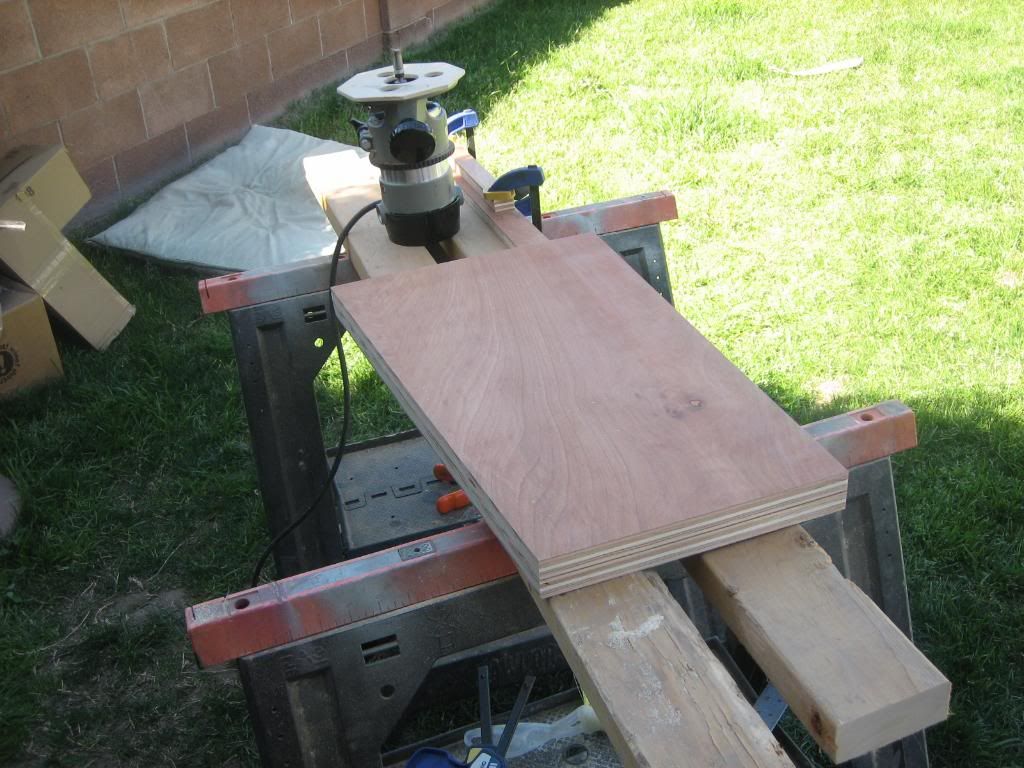
You can see an unstained piece in the background. This piece in the foreground will provide all four sides (2 for each stand). I cut the pieces for both stands at the same time so I could assure I had the saw set the same for both.
The angles for the side pieces were cut with a circular saw and everything else was cut on the table saw. I bought a new blade for both saws before starting this project and I can't say enough about how much that helps. It's like having brand new machines. I did not include the cost of the blades in this project as they will last me probably two years at the rate I use them.
All the sides came out the same size except one was just a hair too big so I used the router with a pattern bit to match it to it's opposite side.
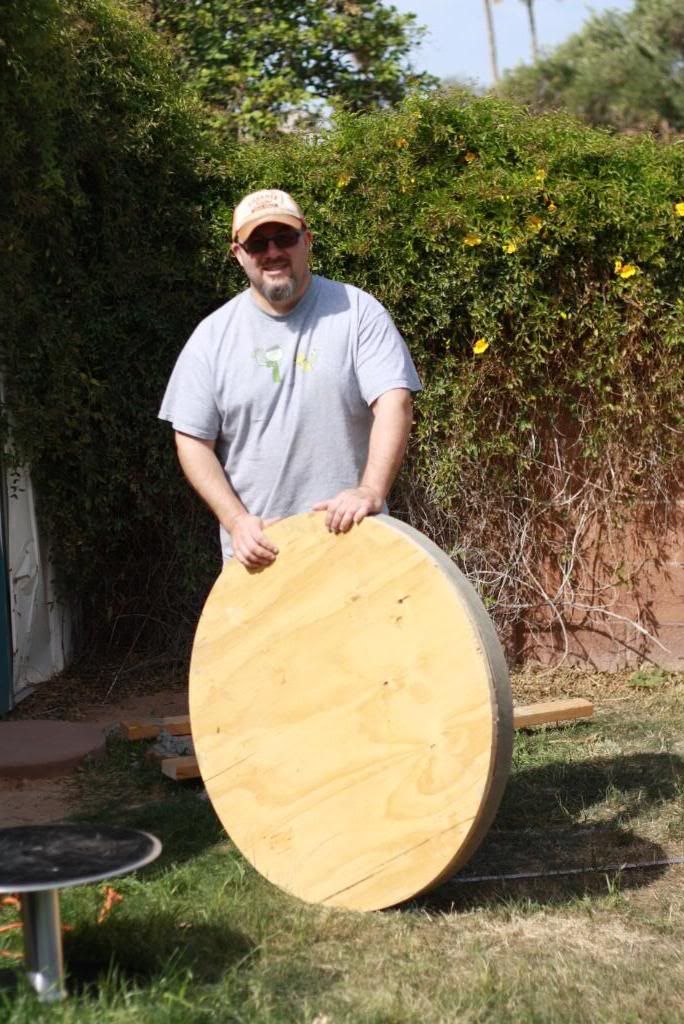
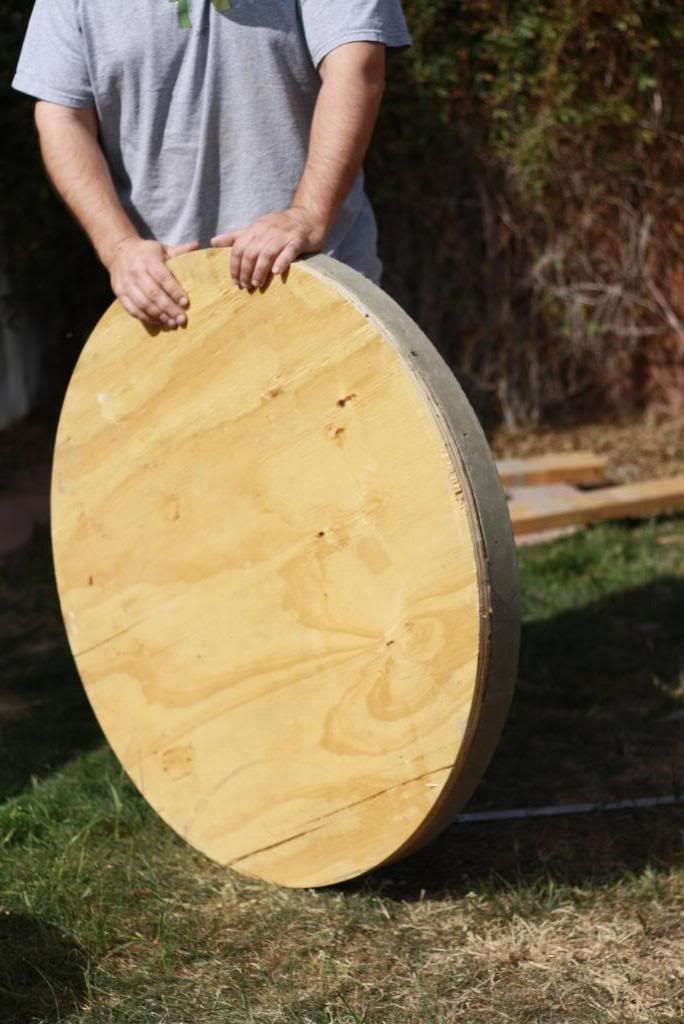
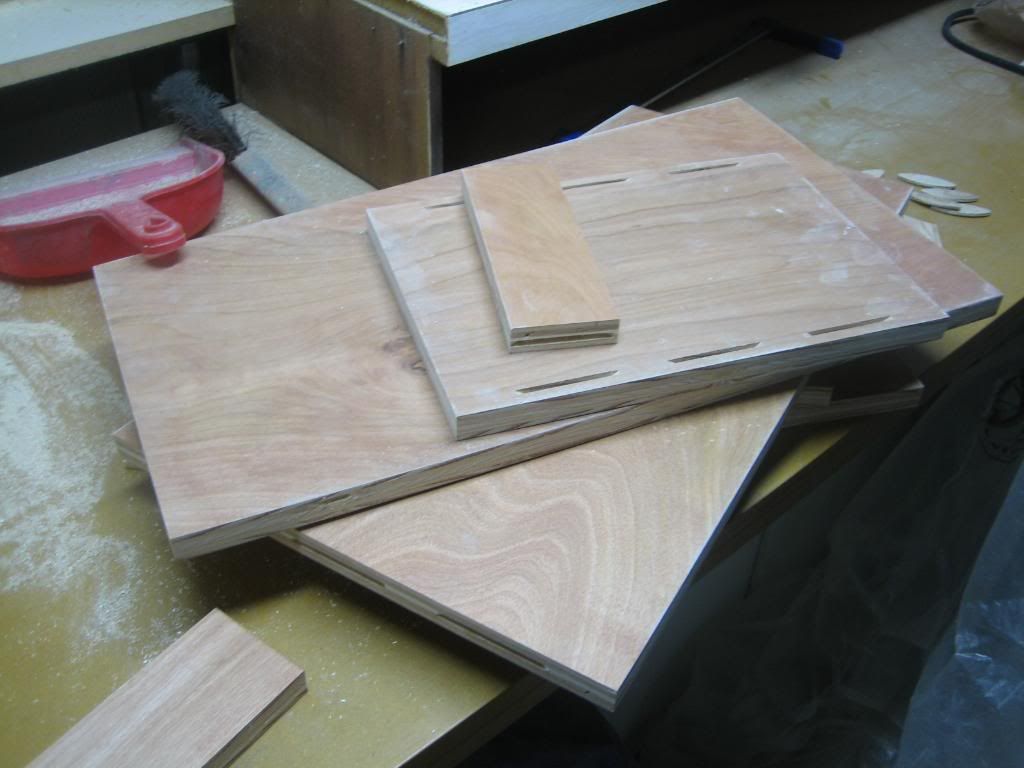
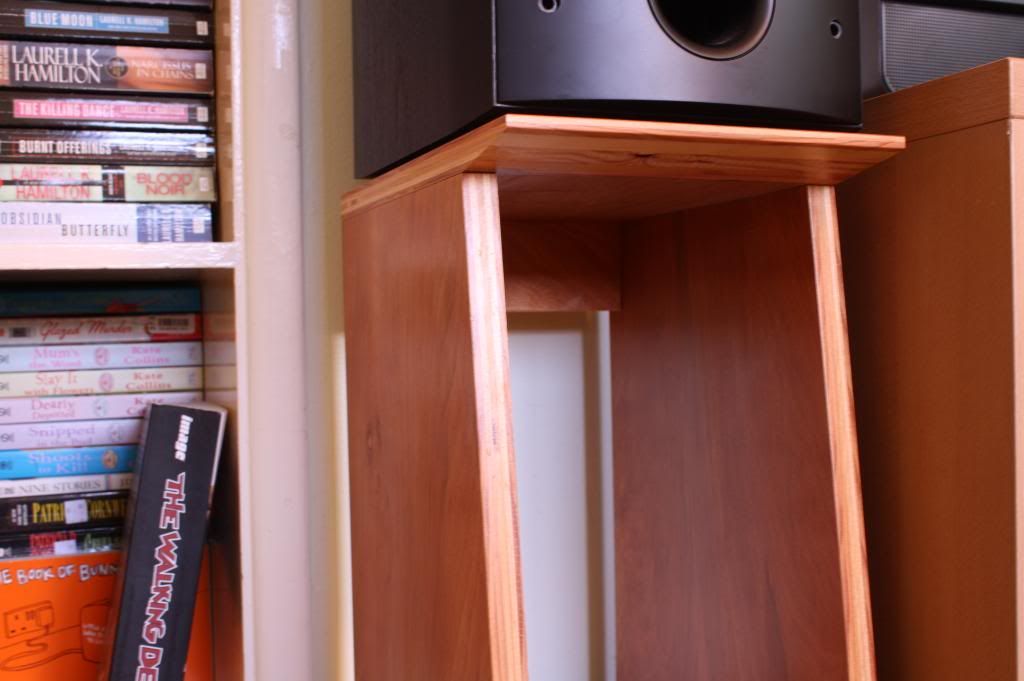
The trickiest part is the design of the end of the top shelf that tapers to a thin edge. In case you care, I did this with a tenoning jig. It wasn't as tough as I thought...I just kept cutting scrap pieces until I got the angle I wanted. Nothing too scientific. Below are the pieces for one stand plus the top of the other one.
I mostly use biscuit joints to prevent me from having to make complicated joinery. I've tried a few times and I'm either not that good or that patient or I don't have my equipment set up accurately enough. Anyway, I think I might try building some DIY speakers someday soon and I'll get a little fancier with the wood work on those...probably. But for this, the biscuits work great. They are plenty strong and other than the metal feet I install at the end, there are no metal fasteners of any kind used these stands.
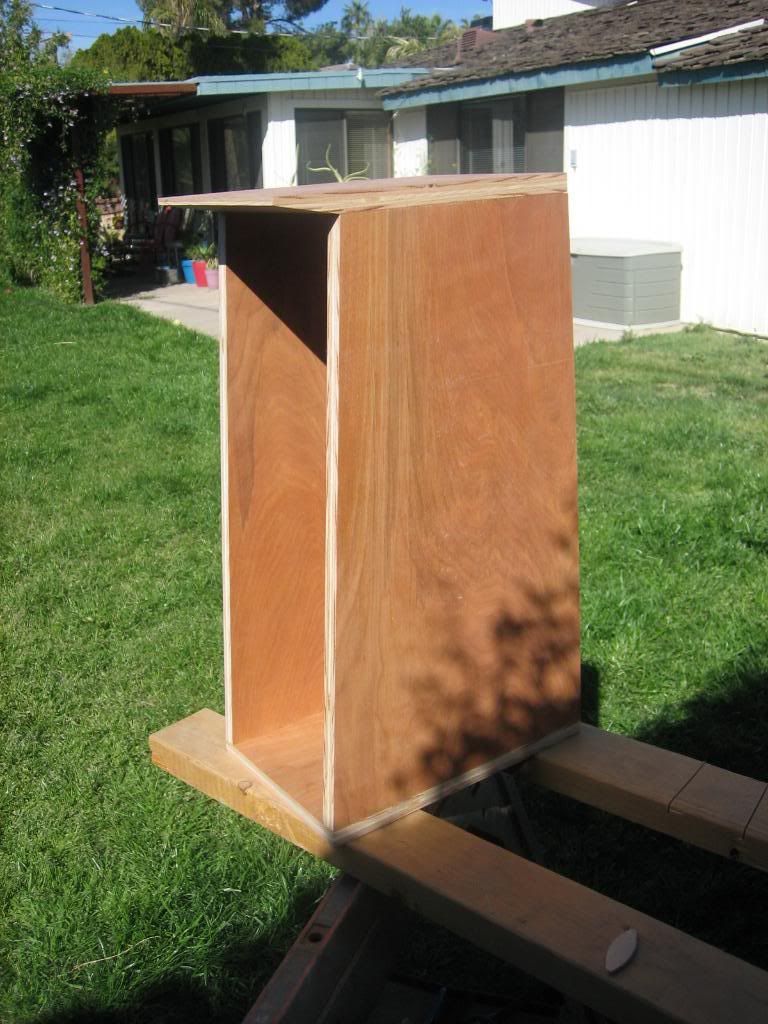
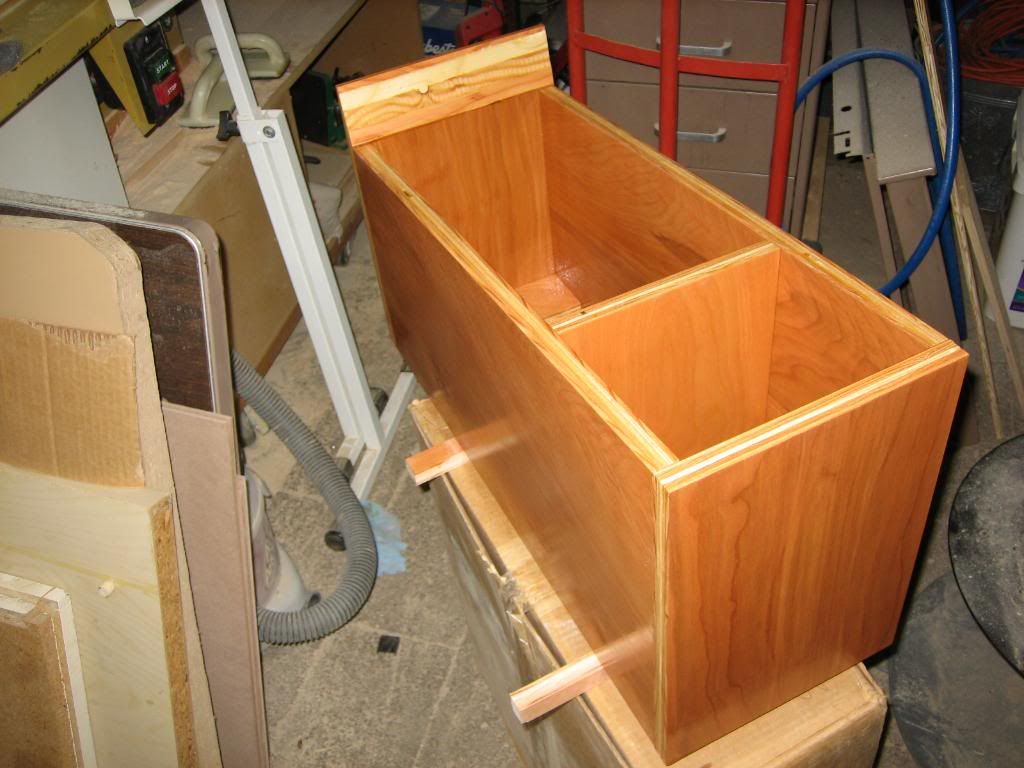
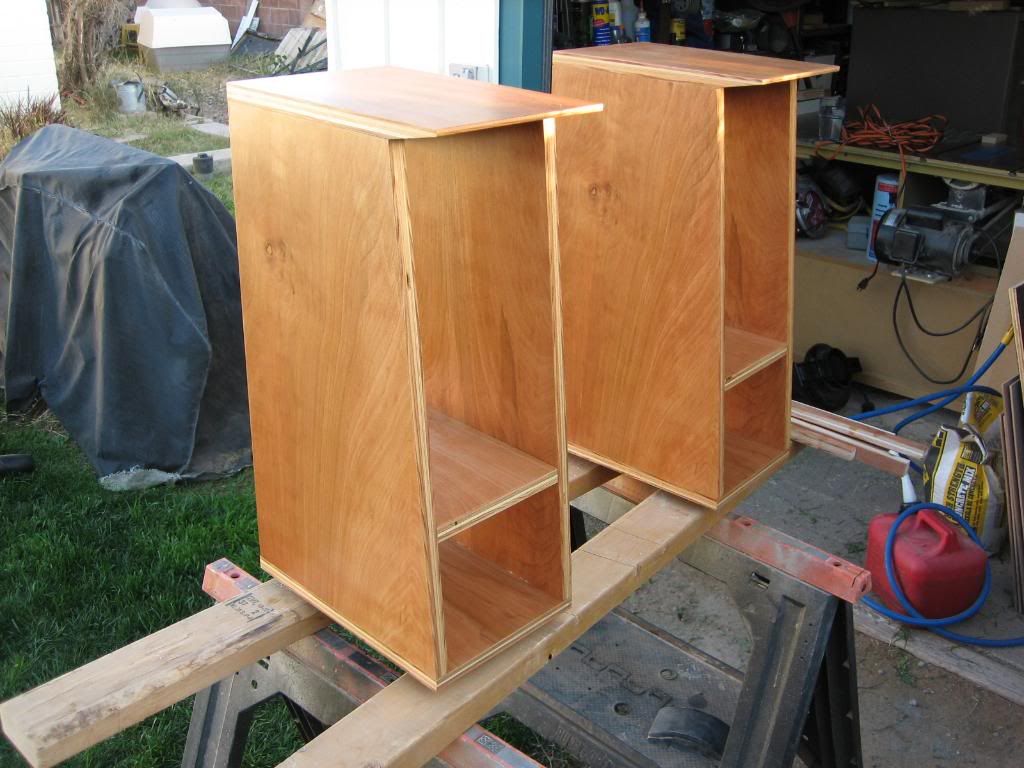
Below is the first mock up...looking pretty good:
Then spacers were made from scrap for the "shelf" so I can cut it to length after cutting the front to match the angle of the canted sides. I made the spacers 1/4" longer than the height of the concrete block. I'll put some sort of felt feet on the concrete to keep it from scratching the wood and I'm shooting for an even 1/8" all around it.
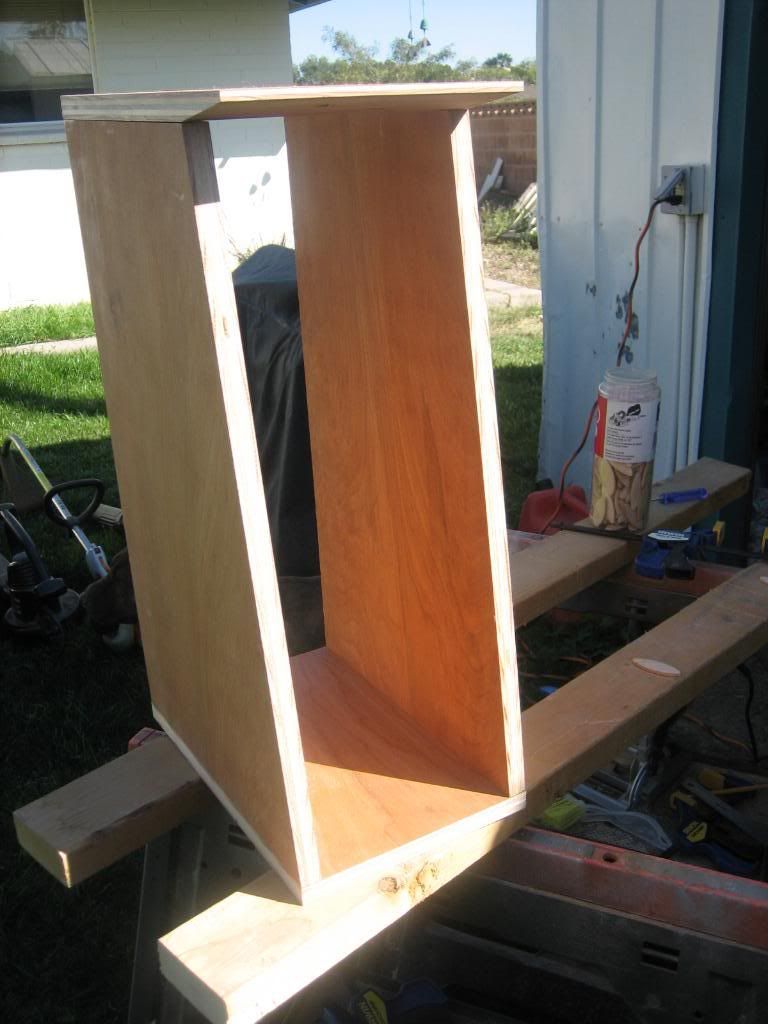
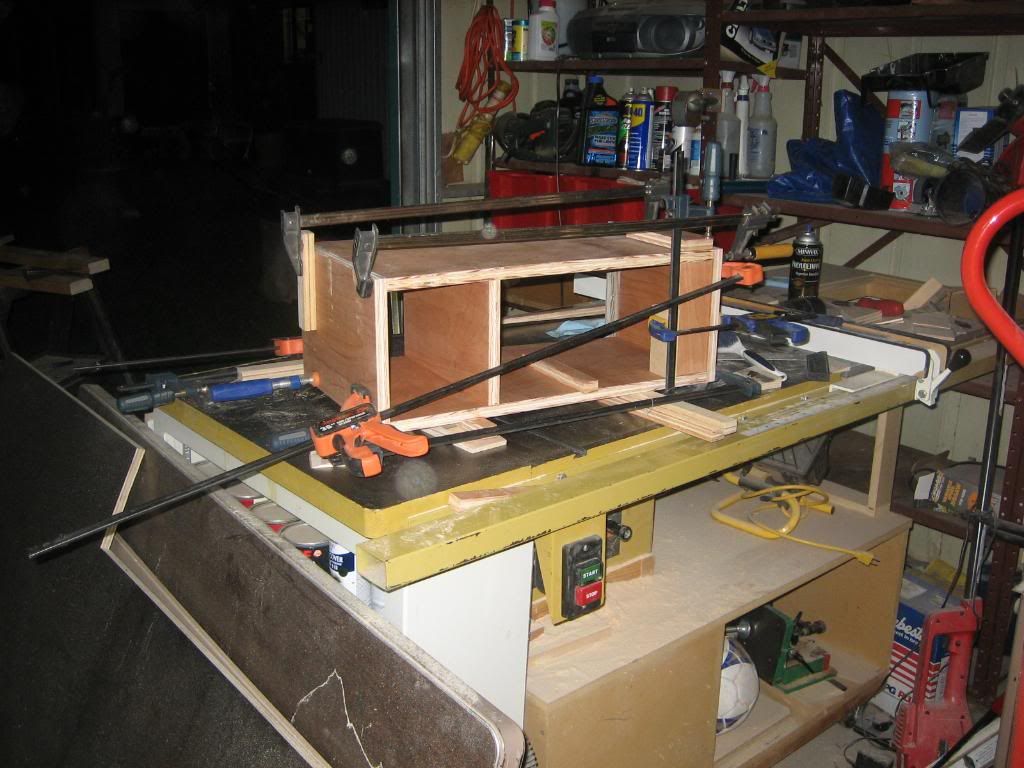
Once it's all cut and test fit, I glued it up with slow drying wood glue so I'd have time to fiddle with it. here it is glued up. This is the end of day one of the wood working...not including the staining, which I did the week before.
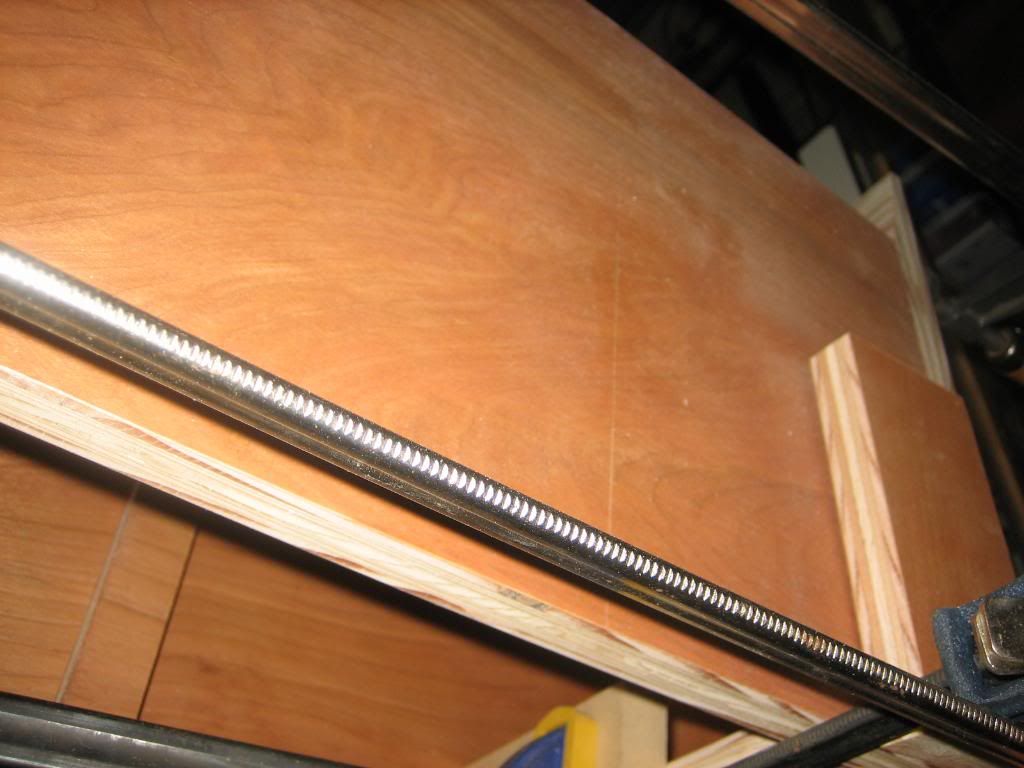
Not until it was laying on it's side with clamps on it, did I see this big gouge (below) in one of the side pieces. Nothing I can do about it now...I can't sand it because that would ruin the stain. I sanded all the edges prior to assembly so I wouldn't have to sand anything before applying a finish.
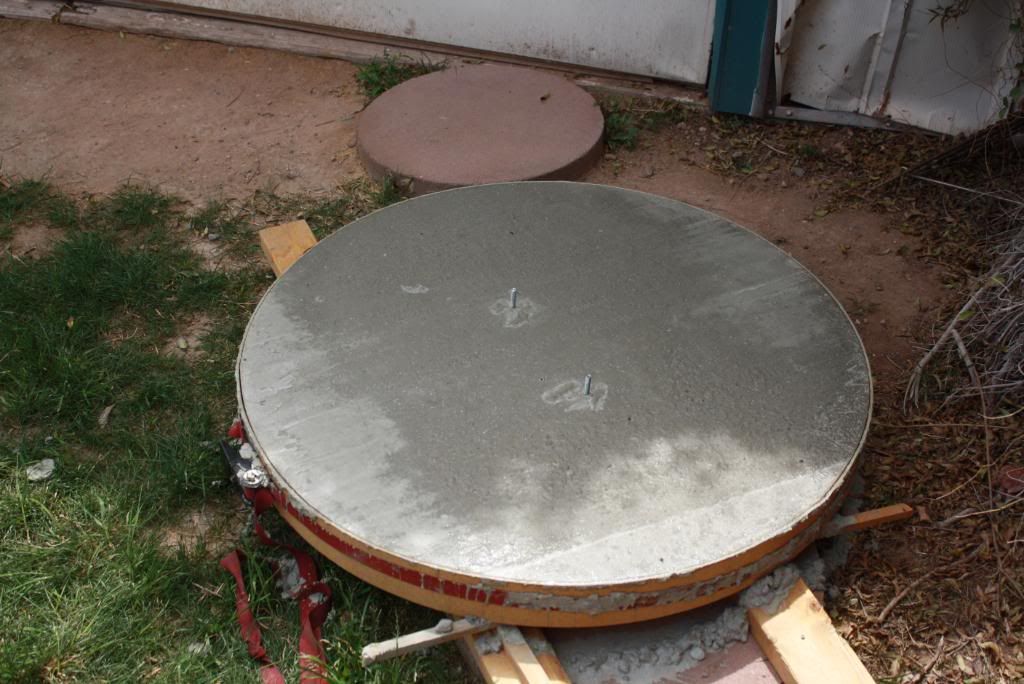
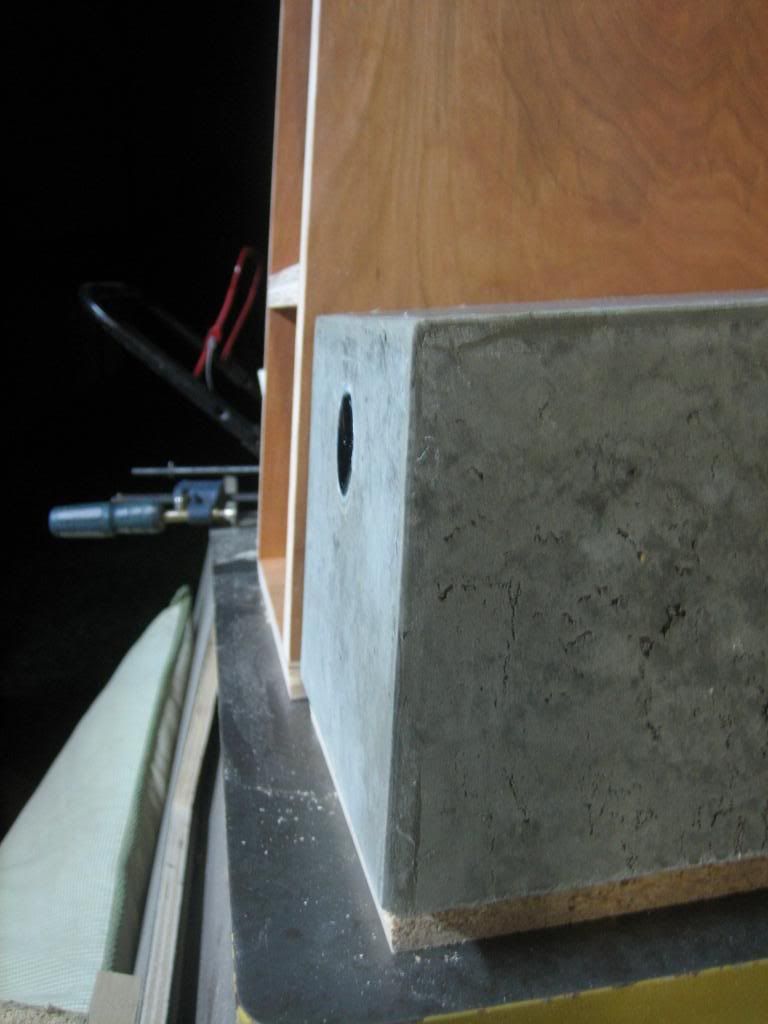
A couple days later I remove the clamps from the first glue-up and the form from the first concrete block. It was like Christmas. I was literally giddy.
Here's the concrete coming out of the form. (Note I leave the end pieces long on purpose so I have something to bang on with a mallet to loosen them up because the caulk wants to hold it all together and you don't want to have to pry against the soft concrete.)
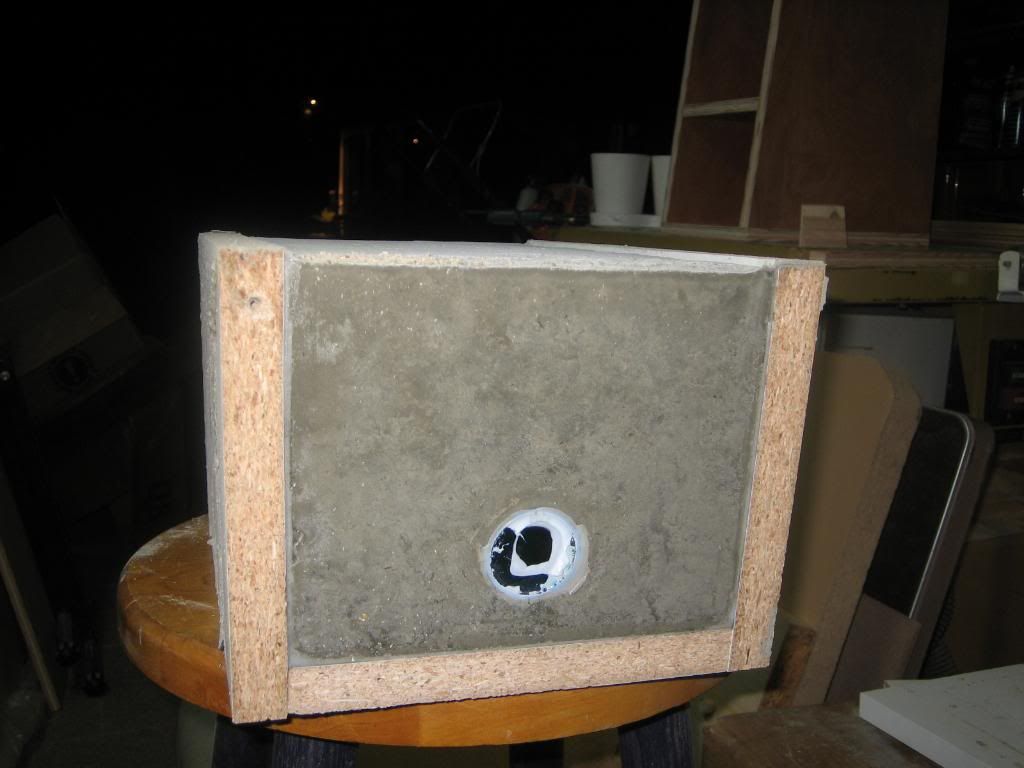
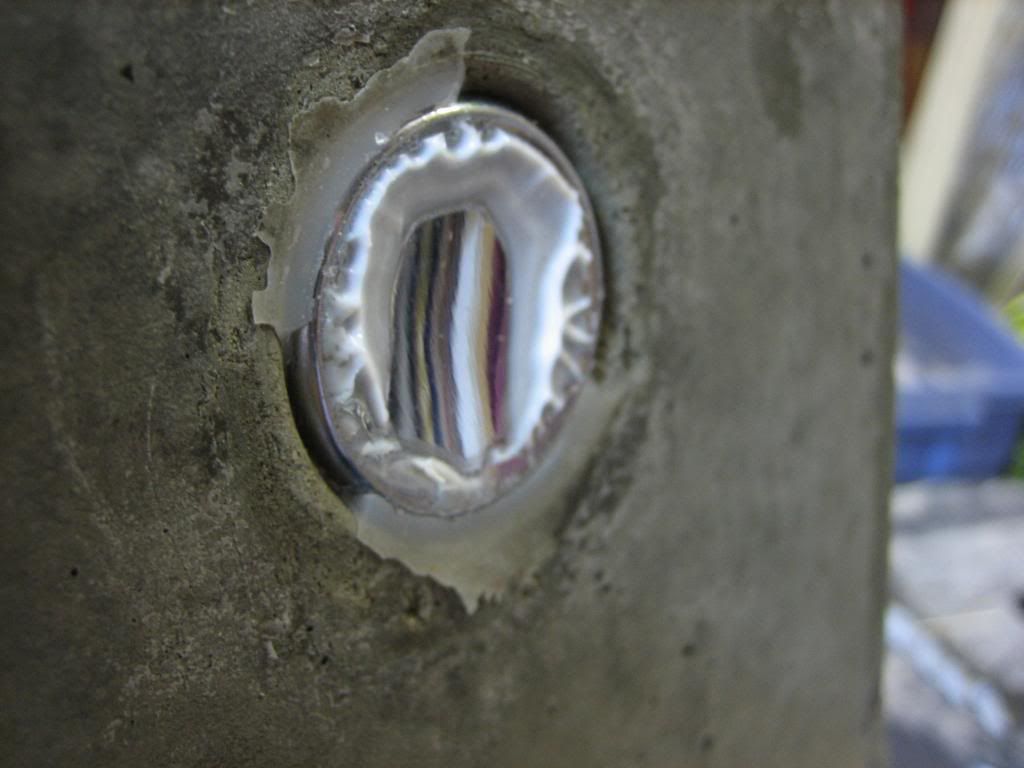
Looks like the knob stayed in place...whew! The caulk will prove fun to get out from around it. I will do a much better job on the second try. But overall, I couldn't be happier. Below is the first stand with the first concrete block next to it. Looks like my math is good and the slopes match!
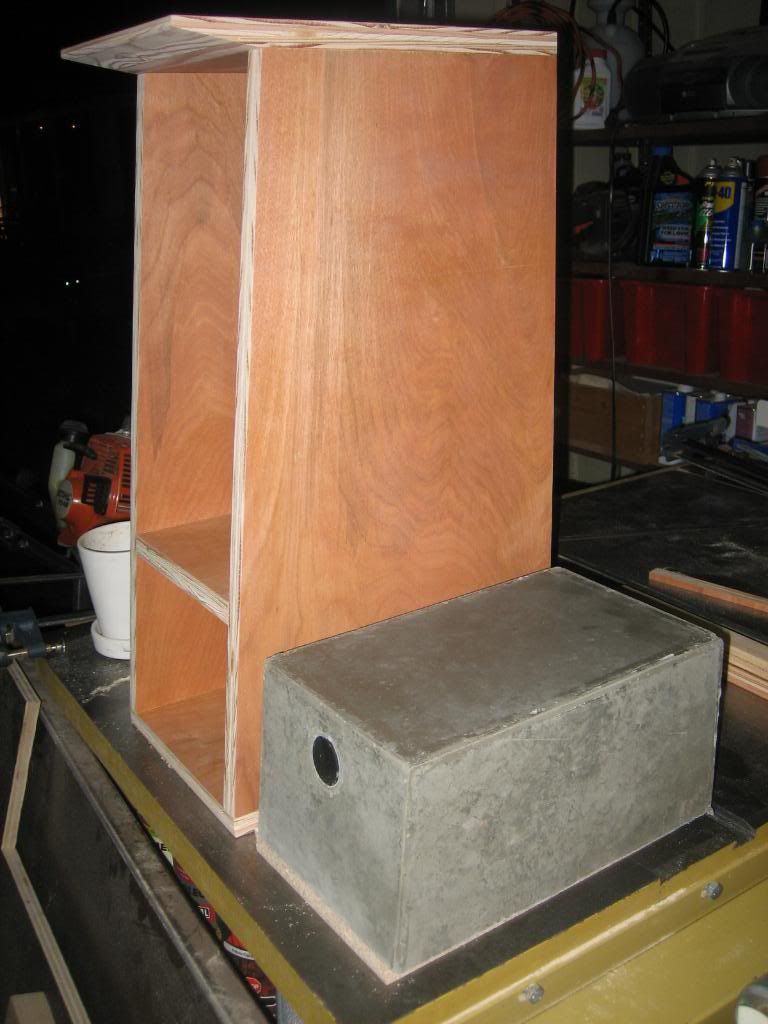
I couldn't wait...had to test fit it just long enough to take a picture. The concrete still needs to cure and I don't want the moisture affecting the unfinished wood.
After this I glued up the second stand and rebuilt the concrete form from the same pieces. I had to stick the knob on again and this time, I "glued" it on with the caulk and let it dry enough that it wasn't moving around then went back and put a better bead of caulk around it so I could get a better filleted edge. This worked much better. I poured the concrete and had to leave it sit for a couple days.
In the mean time I started to apply the polyurethane finish - satin sheen. This is a pain to work with, I have to say. It has to go on in VERY thin coats and it wants to run no matter what. Here's the first coat and you can see that even after all my pre-staining, the edges are nearly the same tone as the sides:
It's very exiting to see them coming together at this point. The flash photo makes it look a little more vibrant than they really are but they do look pretty good for a first coat. I sanded them between each coat and added two more.
That's Stella keeping an eye on me whilst wondering why I'm not throwing a ball for her.
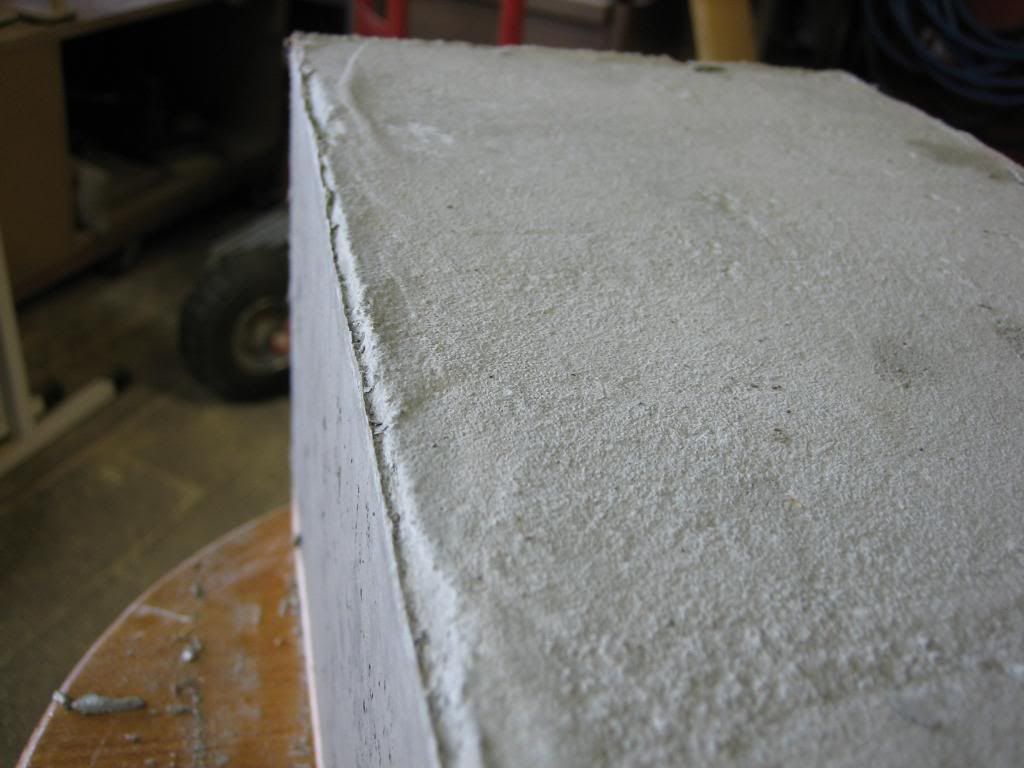
When the second concrete block came out of the form it had this rough edge on it (above) but a couple minutes with a putty knife and some rough sandpaper and it's all gone. You have to do this when it is green, though.
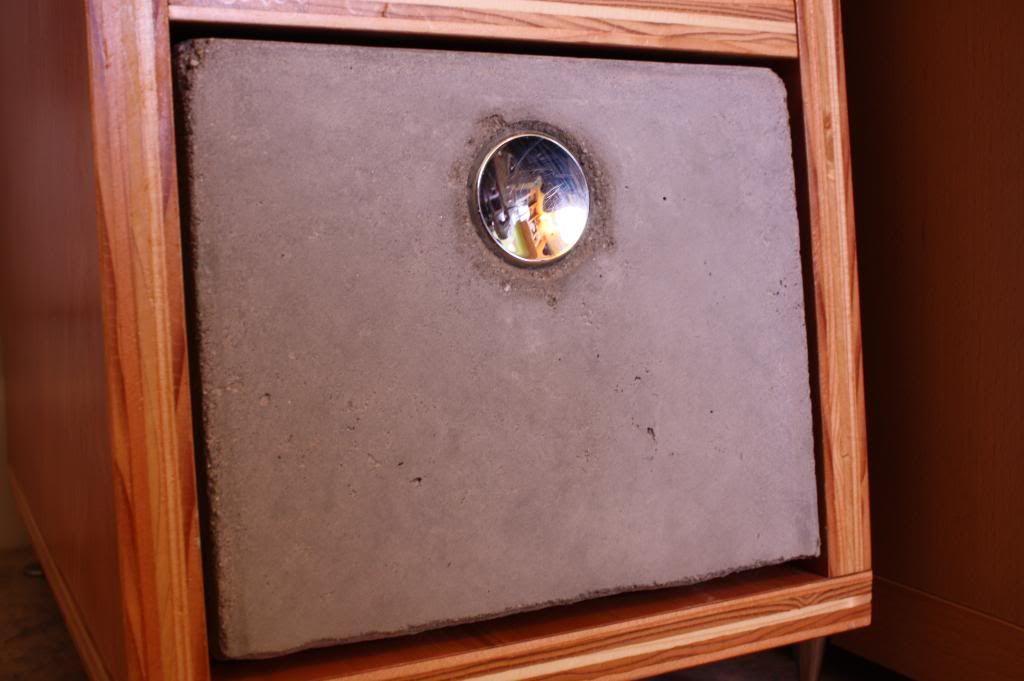
I'll show a better picture when it's cured but in this picture below, fresh out of the form you can see the better grove I created around the "knob" on the second try.
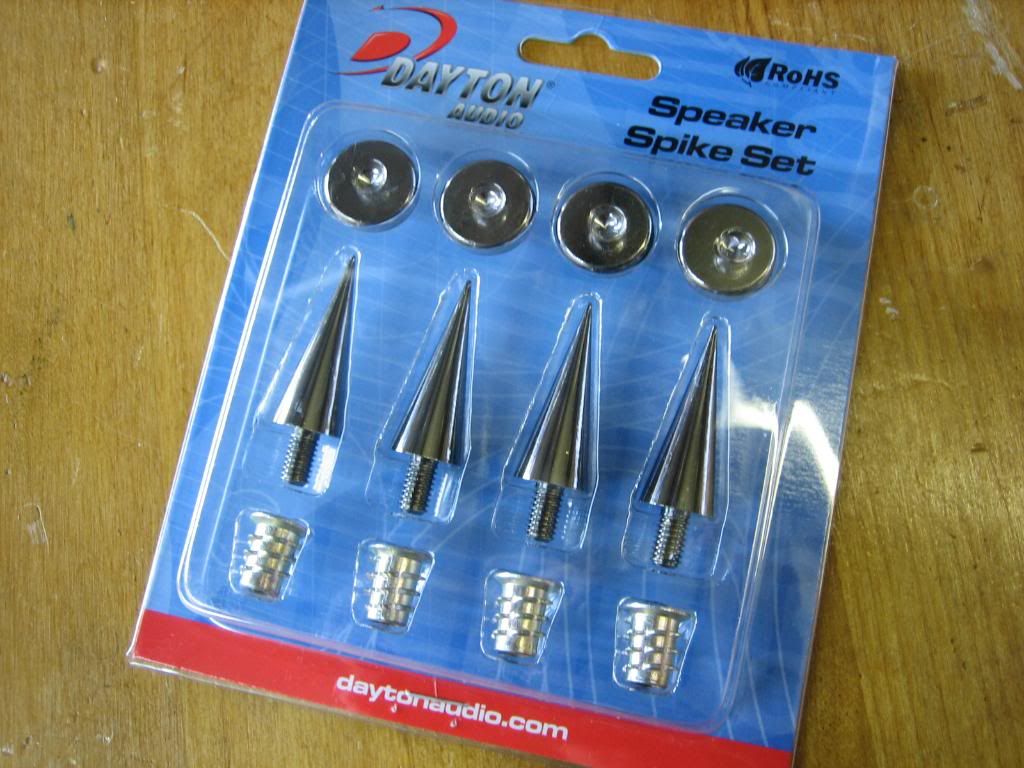
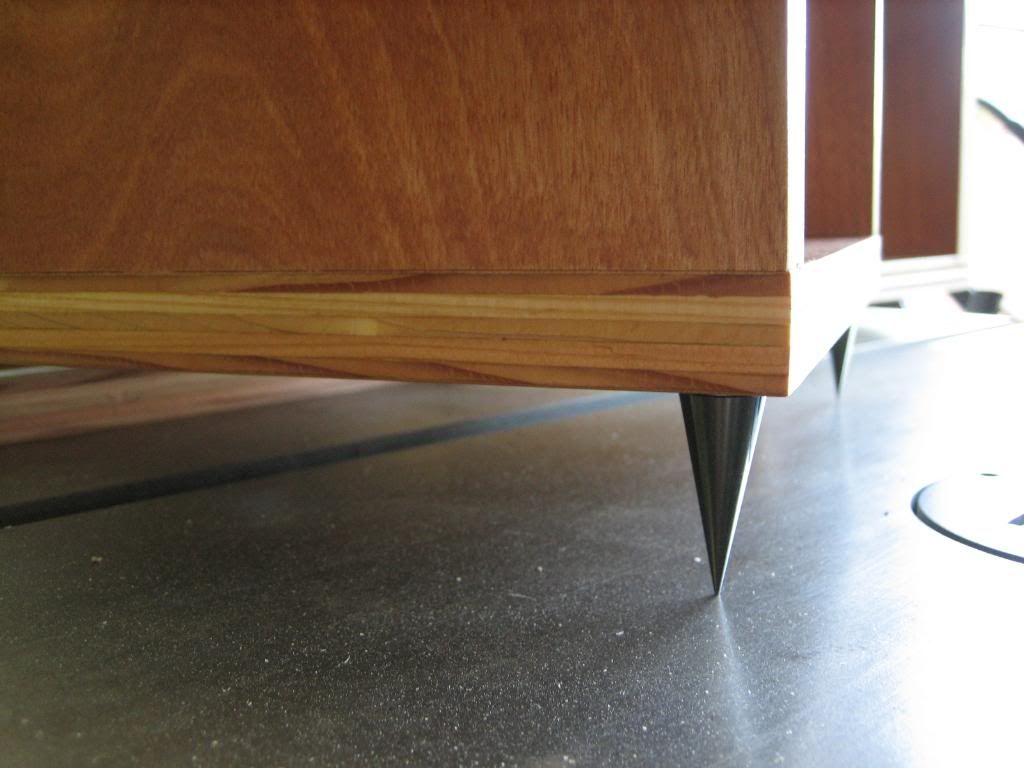
Now that the stands are finished, all that is left is to wait for the last block to dry and install the floor spikes. These serve two purposes...1) to look cool and 2) to connect solidly to the floor. If I just left the flat bottom of the case with no feet it would likely not sit evenly. Adding rubber feet or something like that negates the "coupling" effect so you need a solid connection. Also, if you have carpet, the spikes go through the carpet down to the subfloor (or in my case concrete slab) and make for a solid foundation. For hard floors (not carpet) they come with little metal coasters. They were $27 including shipping for all eight. I bought them from
Parts-express.com, which is really cool for DIY audio projects.
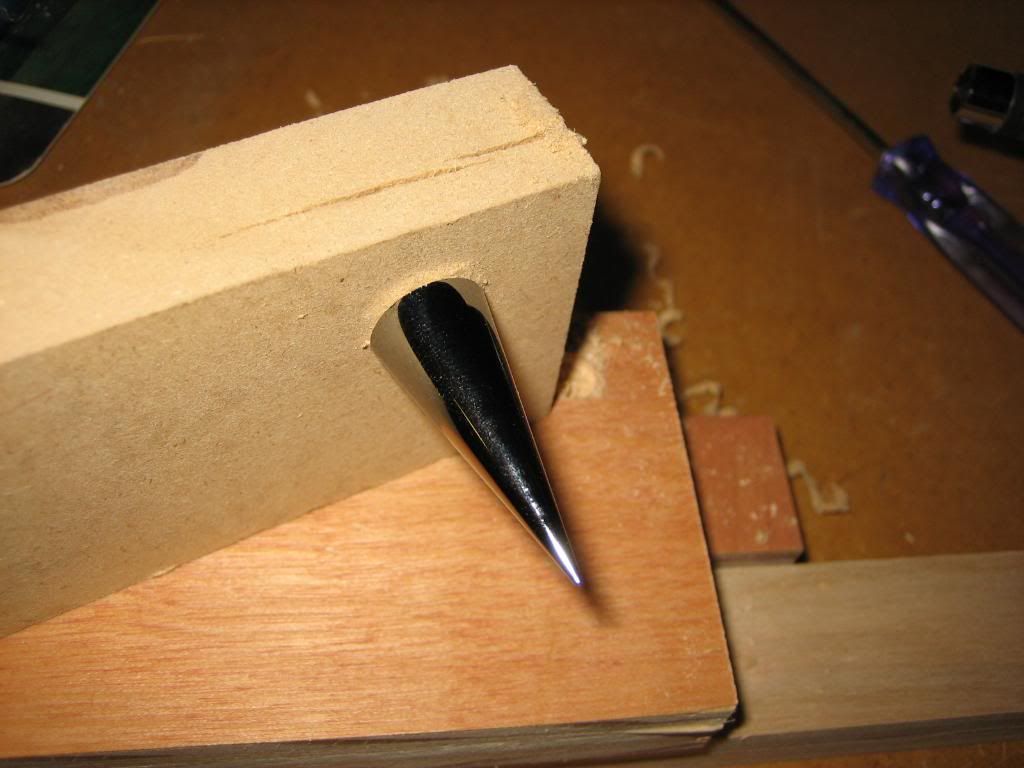
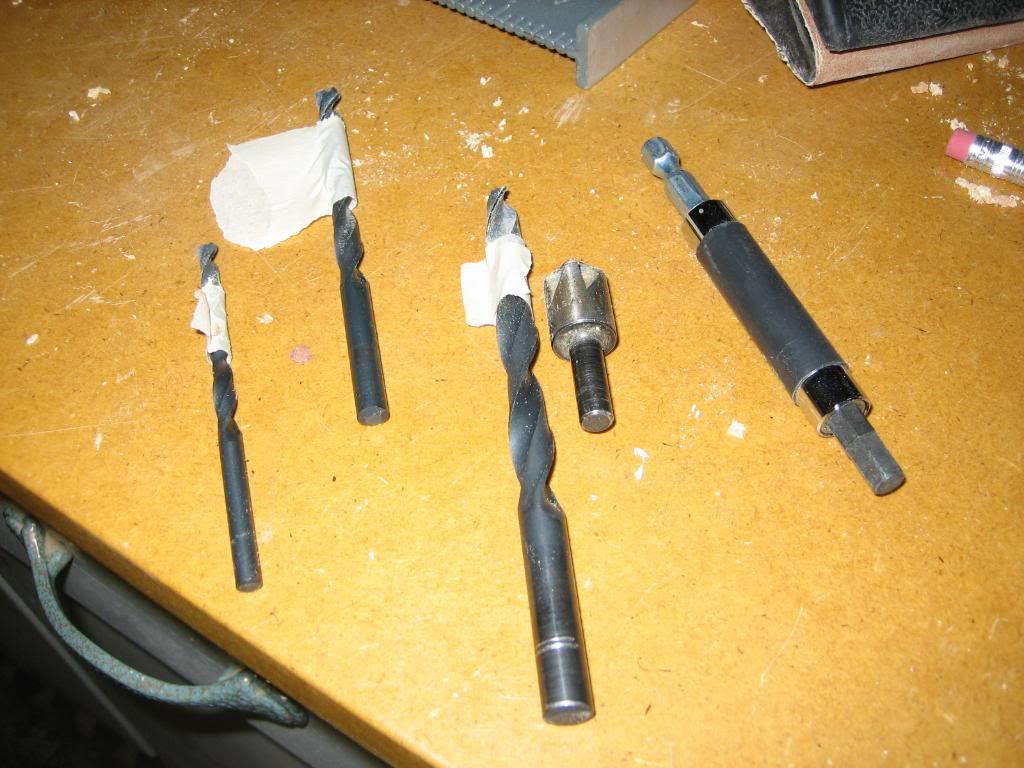
The only complaint is that the spikes came with no instructions whatsoever. Luckily the website mentioned they needed a 5/16" hole so I had somewhere to start. I did a couple of tests in scrap and I'm glad I did because I found if you don't drill the hole deep enough, it wants to split the wood as shown on the piece of MDF below.
I also figured out that it is much easier if I drill the holes out in steps with incrementally bigger bits. The tape on the bits in the pic below is to set the depth so I don't go through the bottom. Note that this would have been much easier to do on the drill press and if I do this again, I'll make sure I have this hardware before I begin so I can pre-drill before I assemble the units. Once together, I couldn't use the drill press.
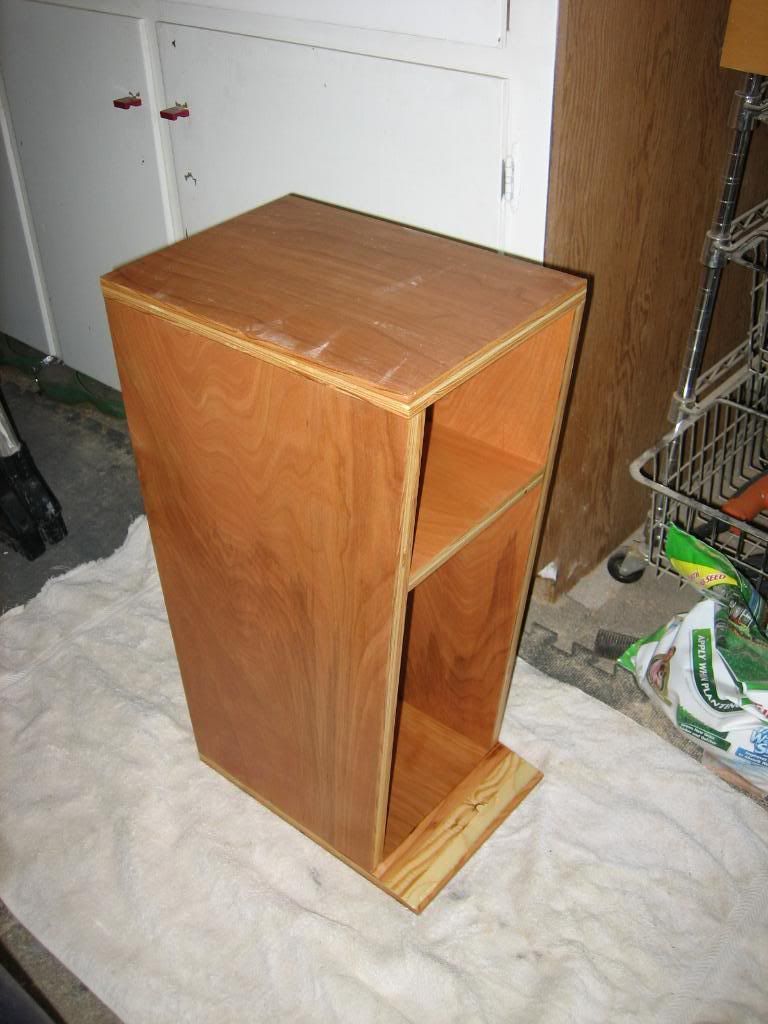
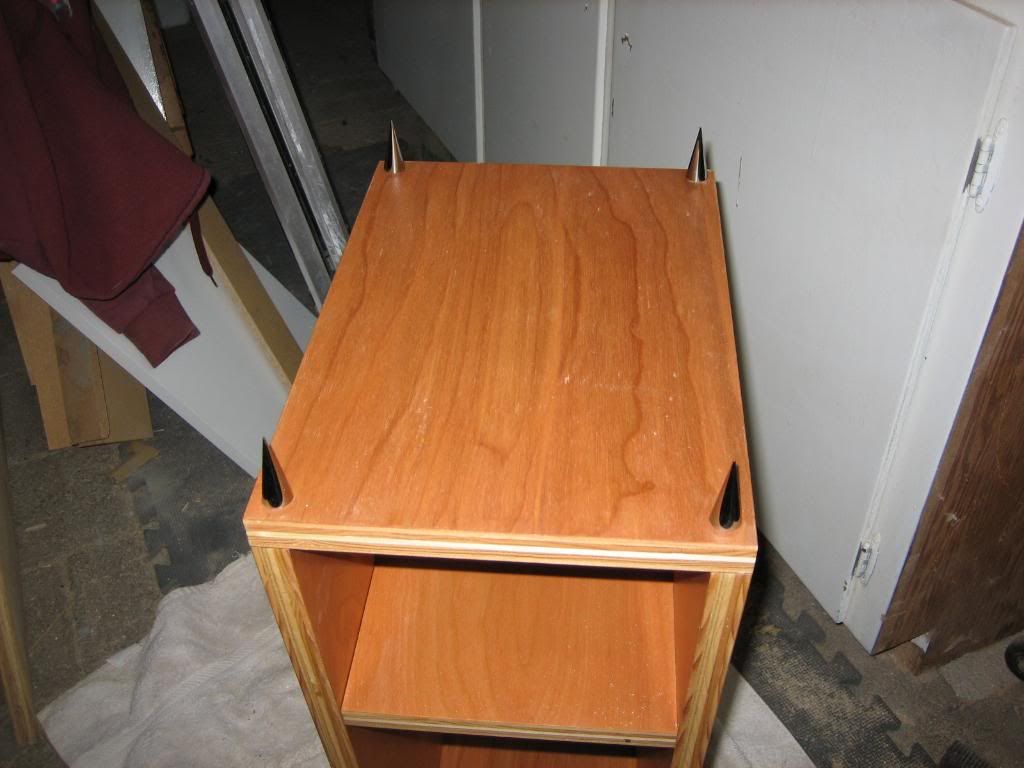
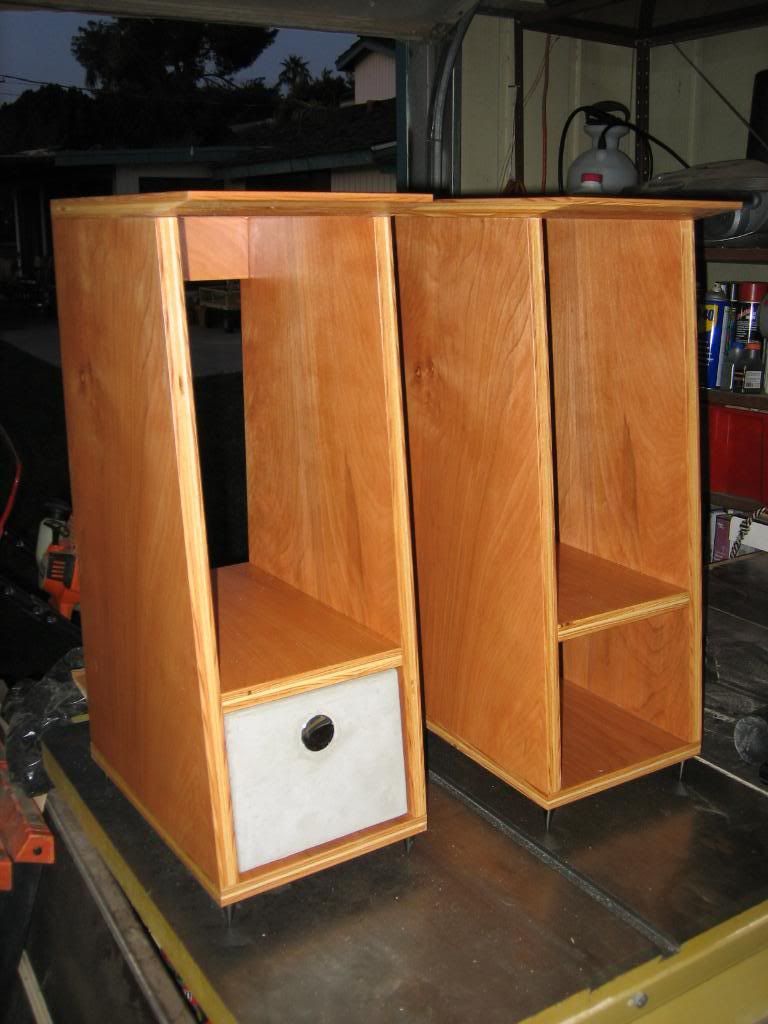
Note to self, these look almost as cool upside down as they do right side up! Almost completed...here are the spikes installed:
And here they are sitting together...all I need now is the last concrete piece to cure! Then I'll post pictures of them in place.
With the concrete in, they weigh right at 45# each, which I'm very happy with. They're resistant to being pushed over. Some of the "post" design stands with lead shot in them can weigh almost 100#! If I didn't want to cast the concrete like I did, I could have enclosed that bottom portion and made a hole that I could fill with lead shot or sand, I guess, but I really like how this design illustrates the means by which it attains its end.
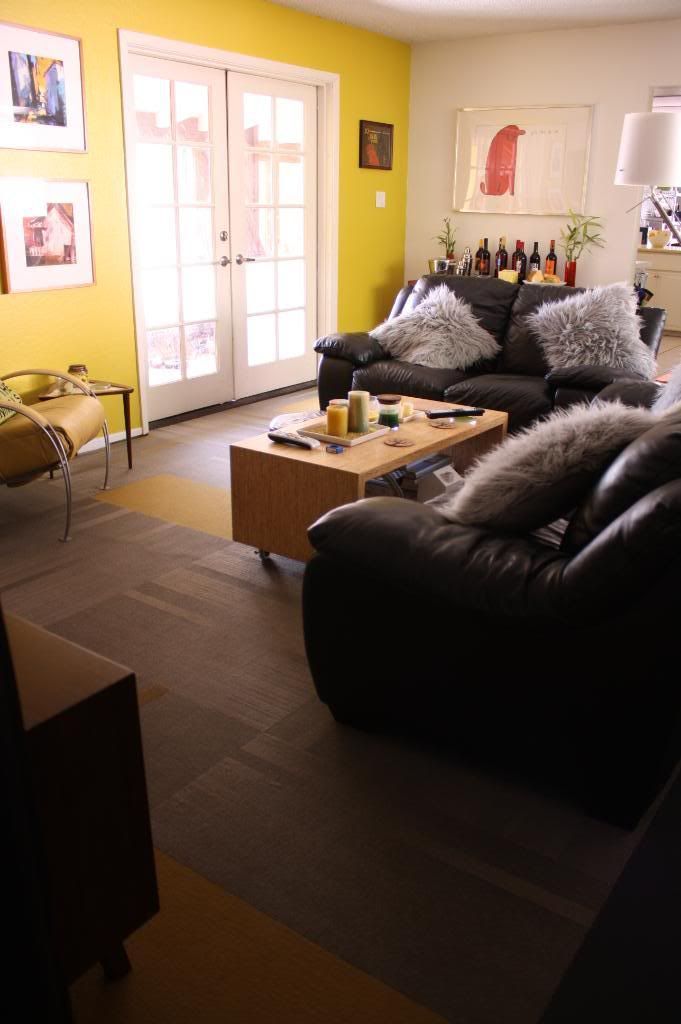
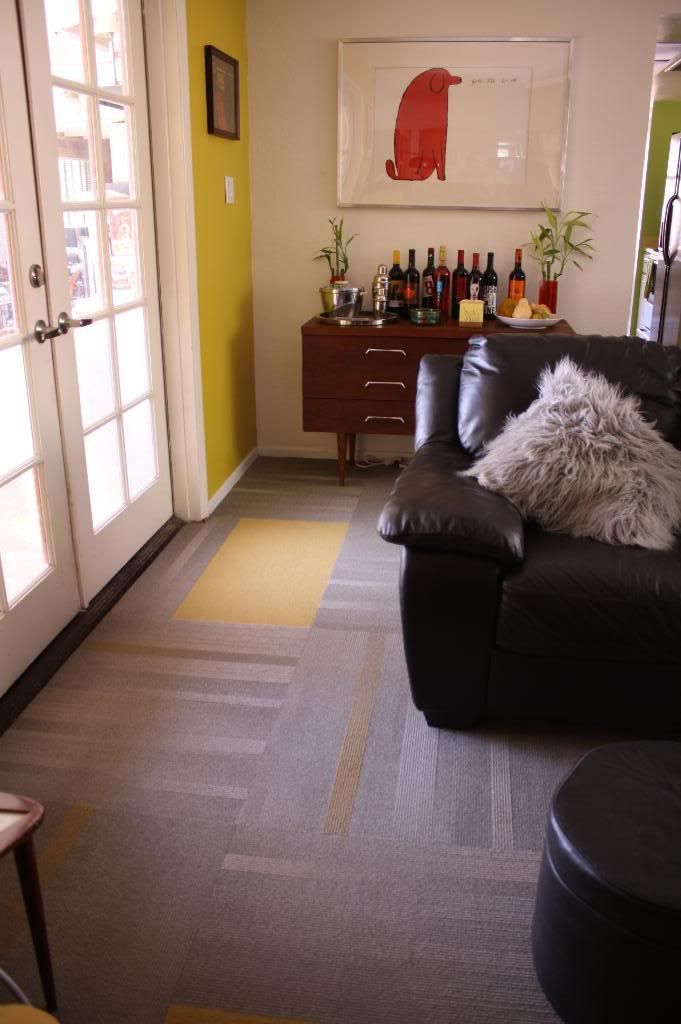
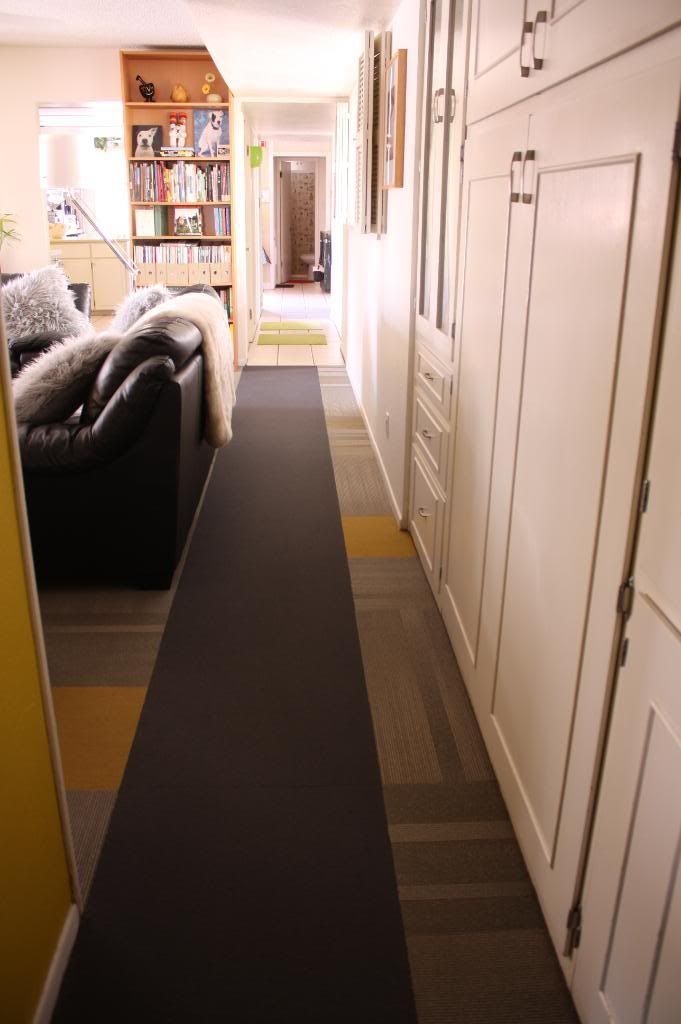
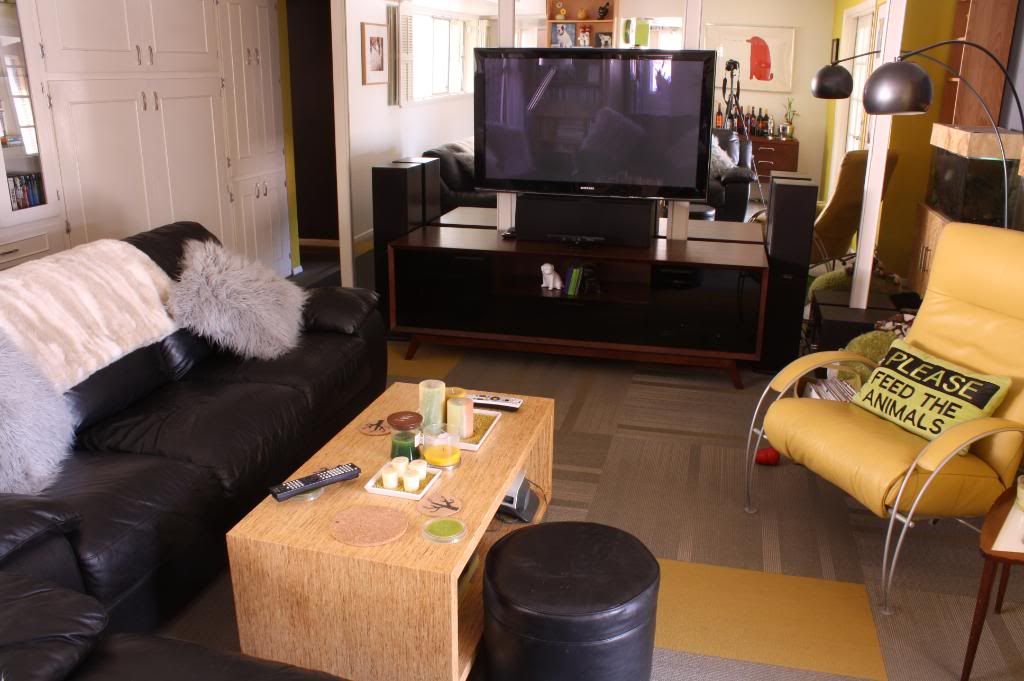
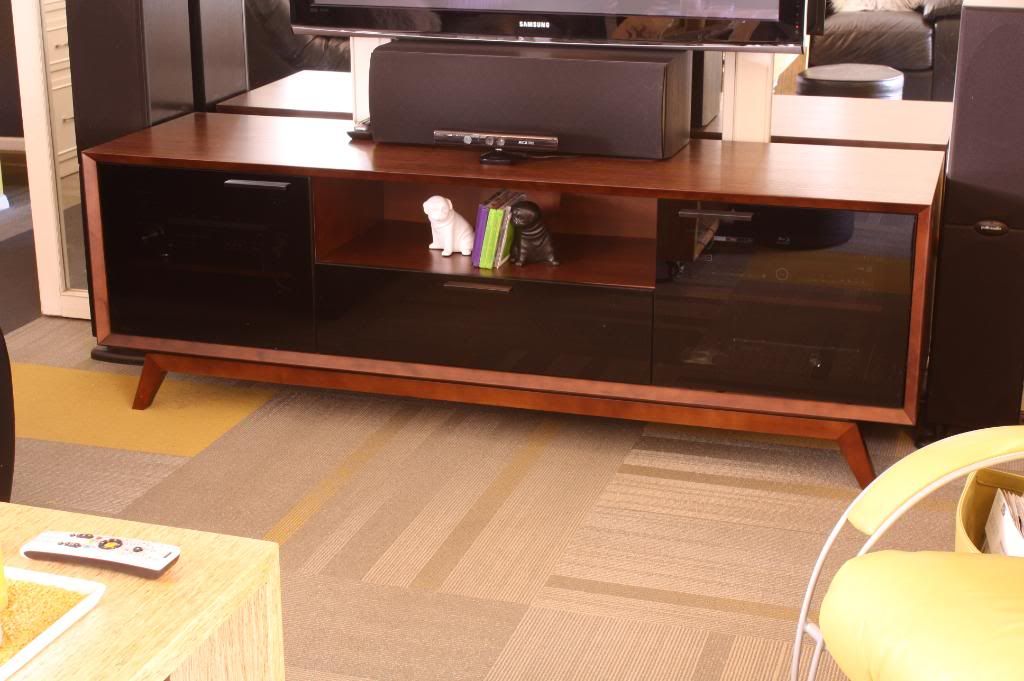
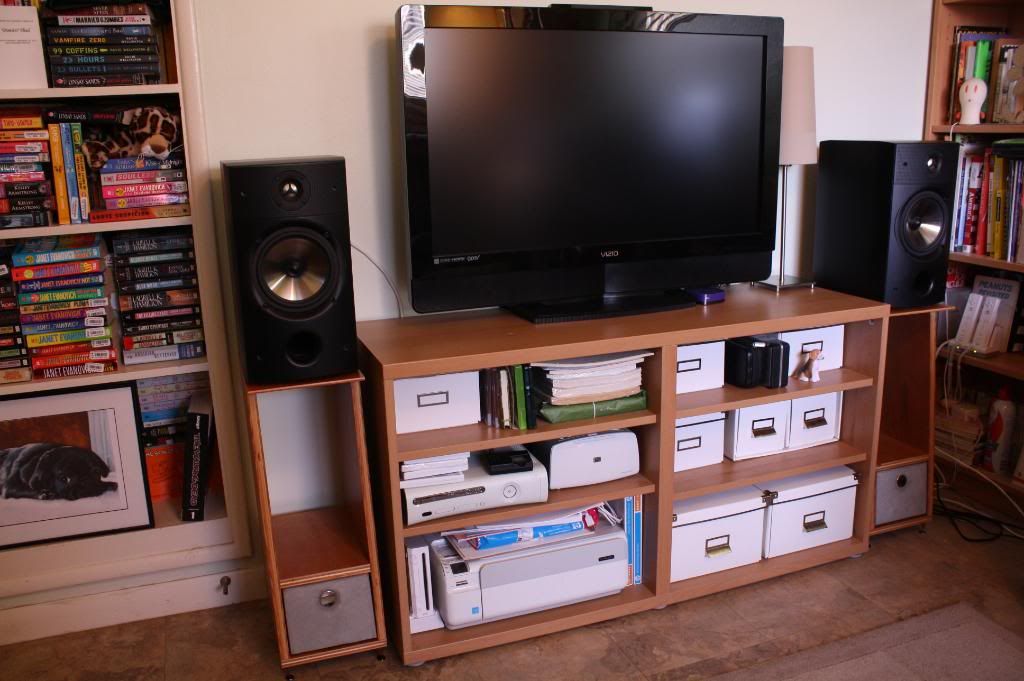
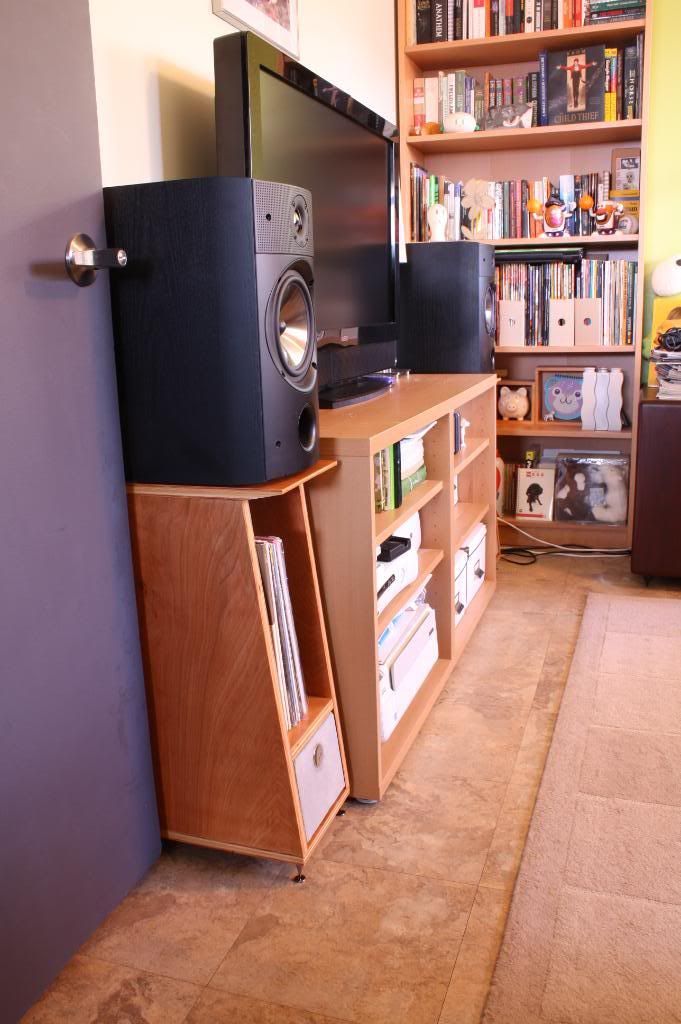
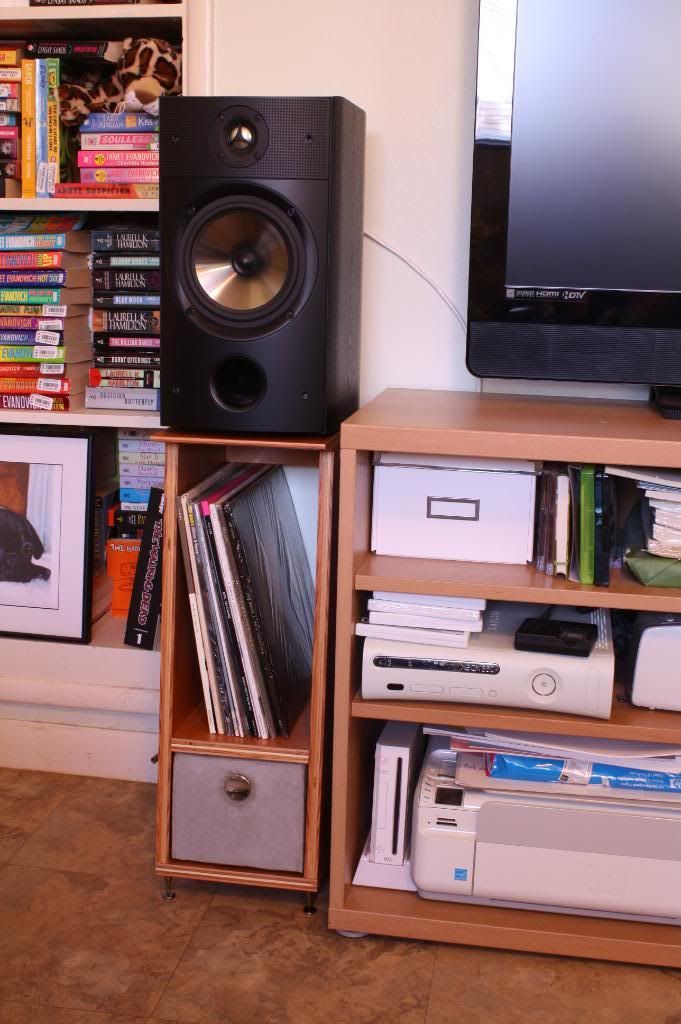
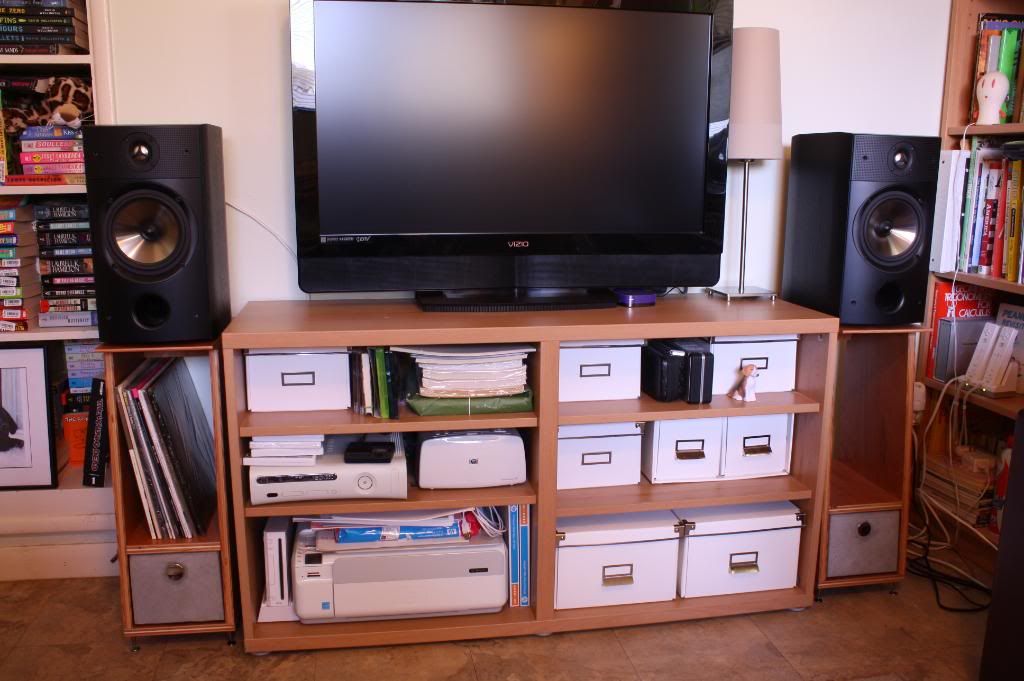
Lastly, here are some pictures of the completed stands in place. The crappy beige vinyl tile was there when we moved in and it's in good shape so it's low on the priority list for R&R.
It's always subjective on something like this to say whether they have actually improved sound. I really think they did but it's sort of like when we (guys) think our car feels faster after we wash it. I've been listening without the subwoofer on and the bass definitely seems more present. The GF doesn't believe the sub is off so I guess that says something. Who knows... The bottom line...The GF is happy! Mission Accomplished.
 |
| Raja Bell Keeping Track of me this time |
Thanks for sticking with me through my long-windedness!