Ok, I mentioned in the previous post that lots had happened and not all good. After the events of November, the next big (huge) thing to happen is that I was laid-off on December 9th. Yeah, that sucks. Since about mid October we had been pushing to get the GF's rental house rented and once I lost my job, most if not all of my focus went into that. I'm trying to find a job, of course, but the fact is almost every architect I know either works for the place that just canned me or are unemployed themselves. The odds of finding a job are slim. I am doing what I can and hoping I manage to put myself in the right place at the right time. I think that is the only way it will happen. 'Nuff said on that.
But, I've had some things to take care of and only barely by the end of January did we get the house rented. That is a full time job! I was posting on Craigslist every third day and showing the house probably 4 days a week and returning calls every day. There were also a bunch of things to do over there. You know, if we were just selling it we'd say, "hey, the next guy can take care of it" but when I know that I'm going to get the call to come fix it, I'd rather take care of it now...especially since I have the time.
We had done a lot of work on that place and although this is supposed to be a blog about the current house, since I'm not going to do anything too major in the near future, I think I'll post some of it. But not now.
Now I want to show how romantic I am. I decided that I had more time than money and that I should do something for the girly that she really wanted done. Oh, and I wanted it to be a surprise.
She hated our sink/faucet in the master bath. This was problematic for me because we have a Michael Graves faucet that we had bought for another use and never installed. She wanted me to just put that on there...but where would the fun have been in that? I decided to A) convince her to not spend any money for Valentines Day because we're poor and B) do a makeover on the vanity instead of just changing the faucet.
I swear she asked me about 10 time to put that faucet on between when I decided to do this (mid January) and Valentines Day.
So, enough talk...This is what I did:
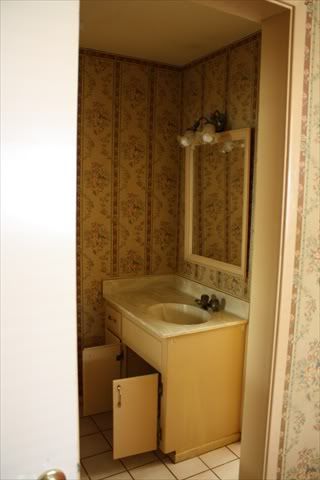
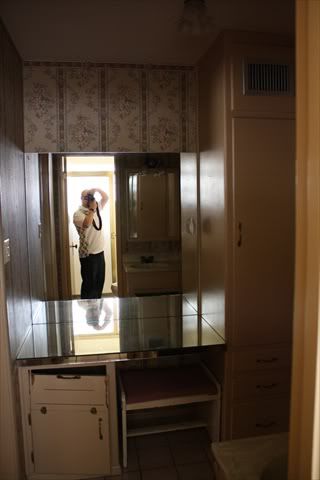
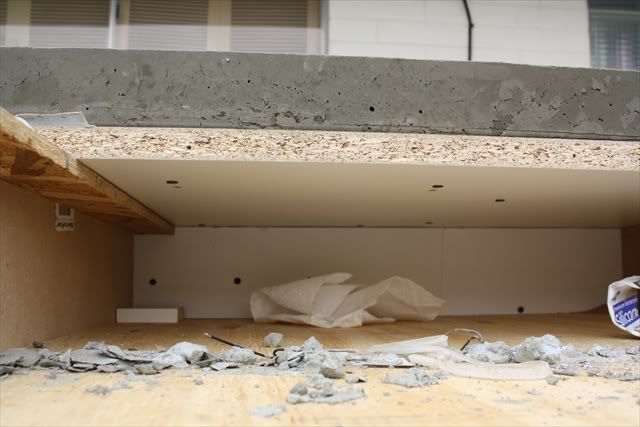
"Before" Pictures
As previously mentioned, we couldn't stand the wall paper so as a temporary fix (now 6 months old) we painted over it so the walls in the vanity area were already a light blue. Here's one more "before" picture showing the lovely...what would you call that? Camel color? ...cabinets and trim next to the blue walls.
Without further do-do, Here are the "after" pics:
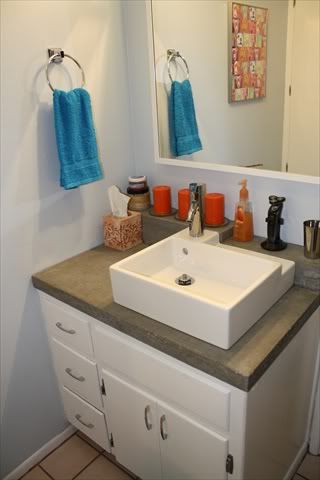
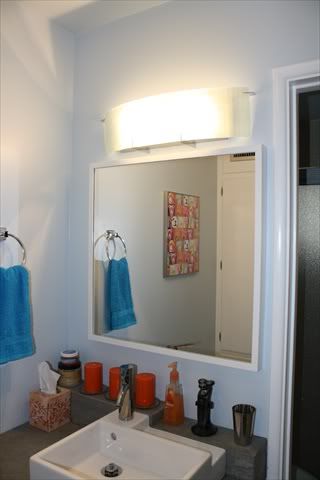

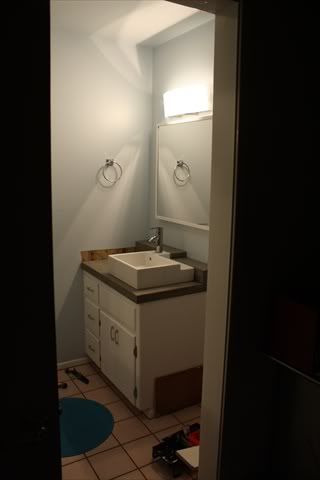
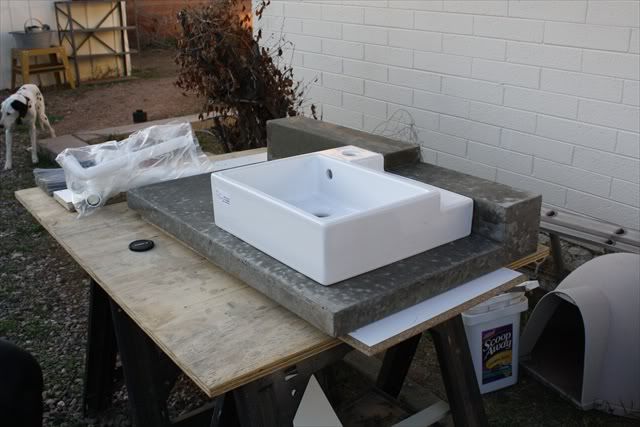
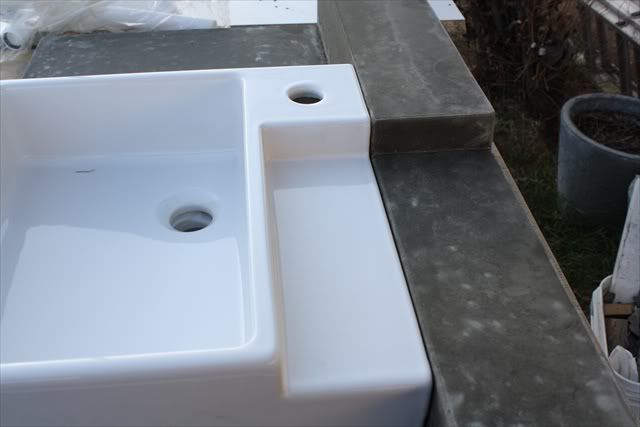
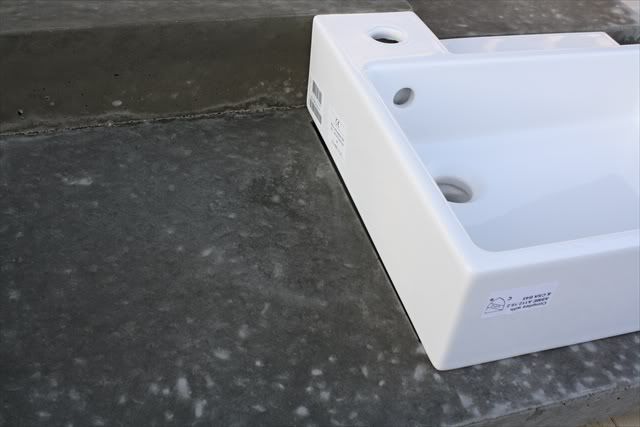
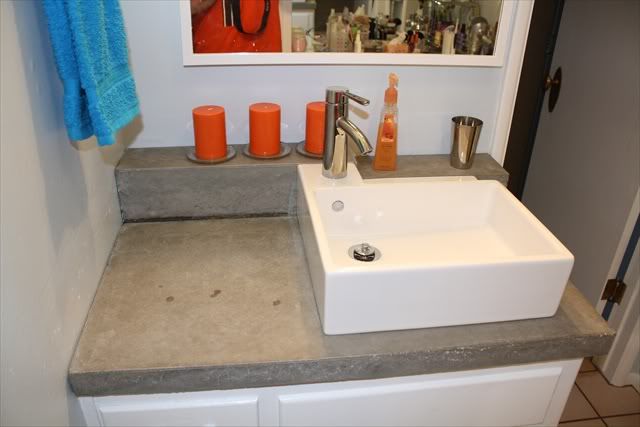
I decided to cast a concrete vanity top and procure some fixtures from Ikea. I got the sink first and part of what I liked about it is how petite it is but I didn't want to have to reach over or bend over useless countertop to the back of the vanity to access the sink so I cast a wide backsplash/ledge into the top and replicated the step in the sink to keep it interesting. The rim of the sink is 37" above the floor.
This is still what I consider "temporary" because I think (someday) I will gut the entire space and redo it but it is not the primary space we want to work on so I'm trying to make it livable for a couple years. This project took right at 2 weeks (working intermittently) including the form and casting and cost about $400, including miscellaneous knobs and hooks.
Sink = $100, Faucet = $100, Light Fixtures = $100, Paint = $30, Mirror = $20 and materials for the top = $40 including the sealer.
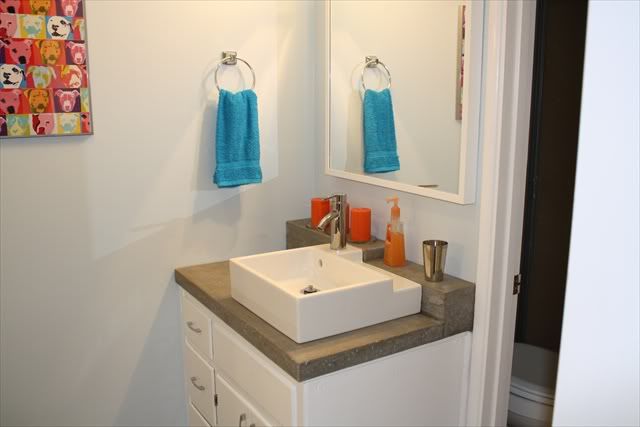
There are 4 light fixtures in this small space. One above the mirrored vanity, one above the sink and one ceiling fixture in this space and one in the toilet/shower room next door. The fixture over the sink is from Home Depot and was $80. The two ceiling fixtures, which don't show up in any of these pictures were a whopping $4 each. Yes, 4. The one over the mirror vanity we put in a while ago and it was maybe $10 bucks. It's really temporary as it is a plug-in fixture.
$400 is actually a lot more than I set out to spend but I think it made a huge impact. We "like" the space now. For now. Next will be getting rid of that peachy floor. Luckily the shower tile is just beige...not my favorite...but not peach.
If you don't care about the nuts and bolts of it, you can stop reading here. But, if you are interested, I'll show you the top from beginning to end:
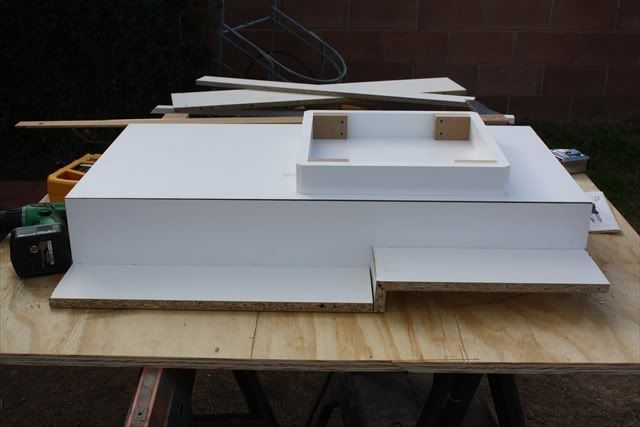
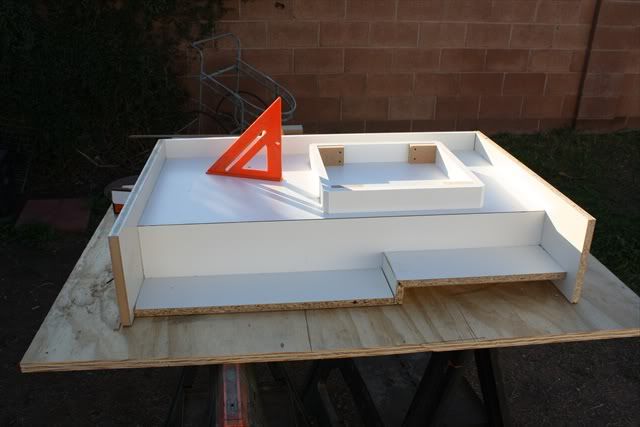
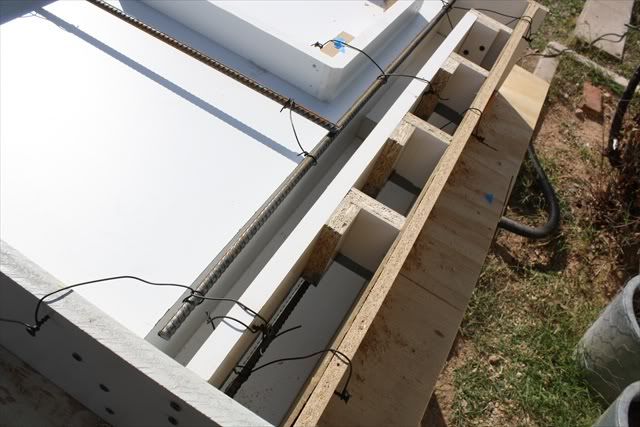
If you try this, for Pete's sake, SCREW everything together! You have to take it apart eventually. If you nail gun it or glue it or anything like that, you are going to be very sorry and you'll probably crack something getting it apart.
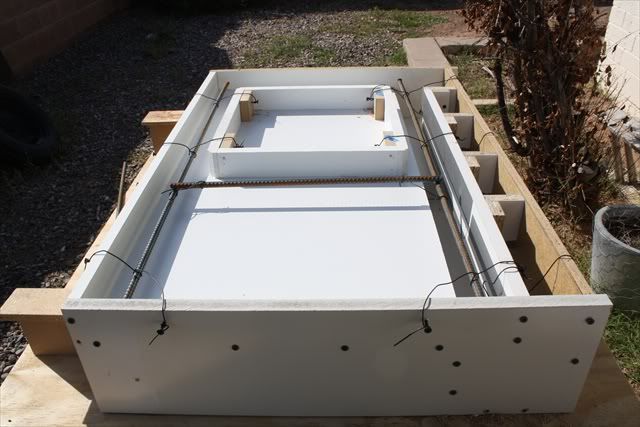
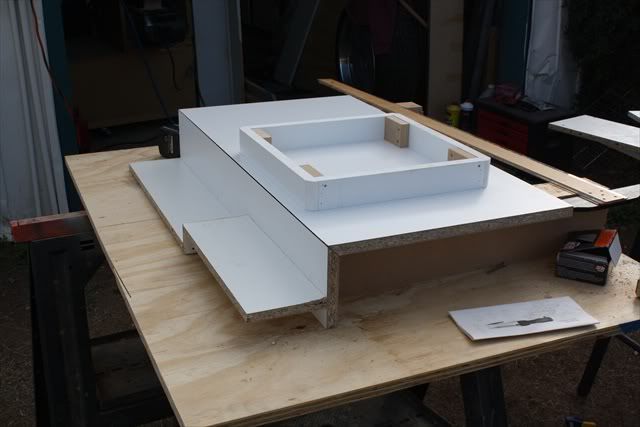
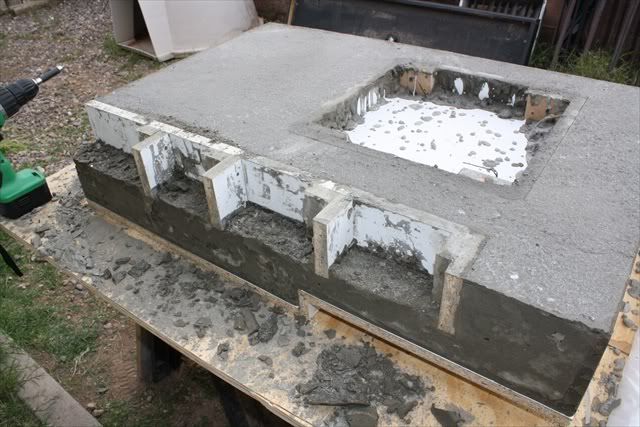
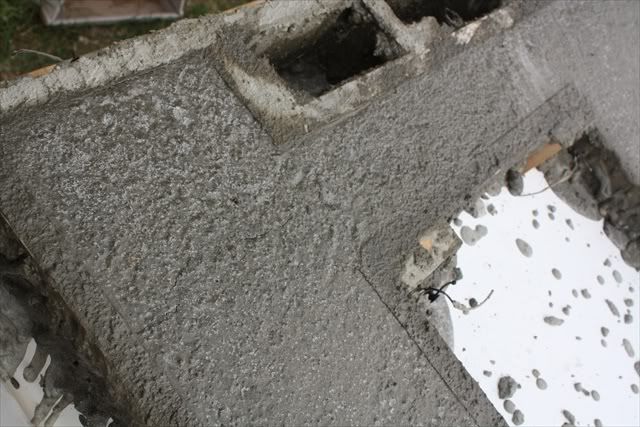
Here it's about ready for concrete. I've laid in the rebar and caulked all the corners. Doing this is critical. Doing it right is even more critical if you want all the edges to come out nice. I didn't care too much as I didn't want it to be "too perfect" and also, it's temporary, remember? I added that ladder-looking thing on the right under the thick part of the ledge to lighten and try to reduce the amount of concrete. From experience, I decided to try a more watery mix of concrete to get all the corners to fill crisply and more water means more shrinkage. The less concrete the better, overall. Note, there is only one bar running front to back. There are 3 running lengthwise.
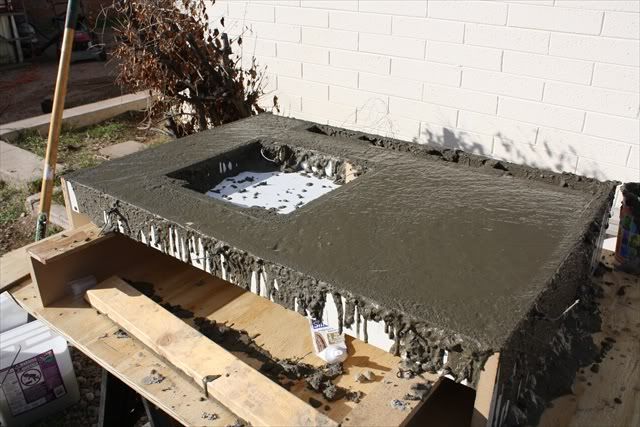
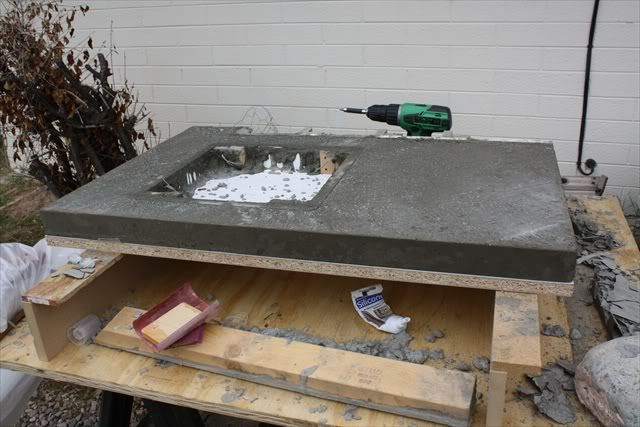
And here comes the concrete. It took 2 days (most of it head scratching time) to build the form and about a half hour to pour it. Once you start you just go! No more "thinking about it" at that point.
Like making a cake. Mmmm...Cake...
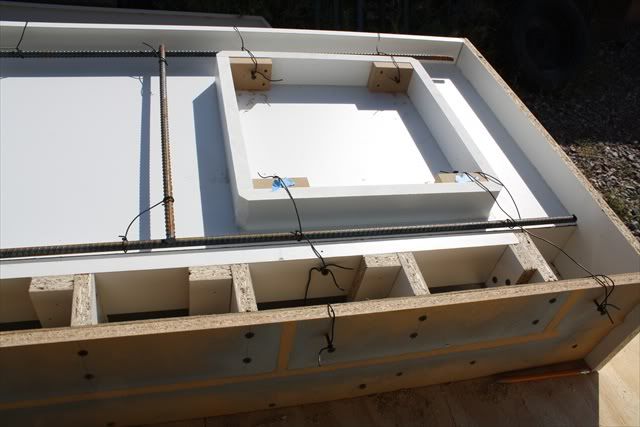
Here it is starting to set up. Look how much it has shrunk. Note that I had to dig the concrete out of the "void" thing by hand after vibrating. As soon as I started vibrating concrete flowed right in there and filled it up. Luckily I had a little extra to fill in as this happened. I used 3 50# bags and had very little waste. I used high-early. I'm not sure if you are supposed to but I wanted to get this thing in quickly (which is code for "I started the form building/casting process later than I planned.") By the way, that void form thing aint ever coming out of there. You'll see.
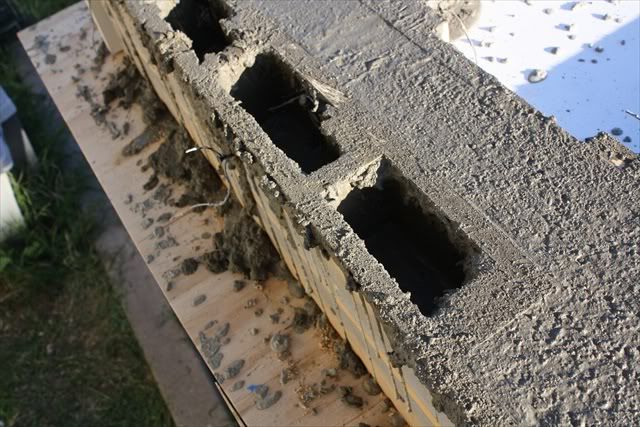
If I had it to do over I'd use a trick I used in school and instead of forming that void I'd just put a couple pieces of styrofoam in there. It's a) lighter b) you don't have to "build it" and c) it would most likely come out.
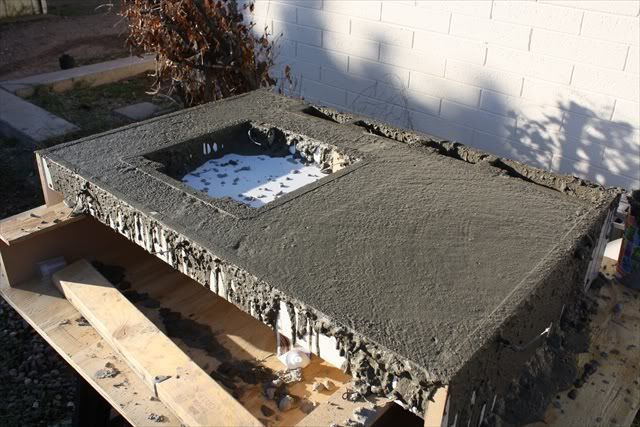
See what I mean about that form not coming out? I taped the exposed edges of the particle board so it wouldn't get waterlogged, expand and crack the top. At least I was thinking ahead a little bit.
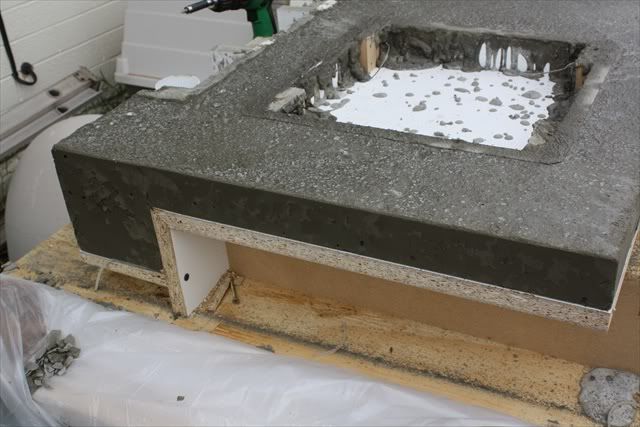
Did I mention a crack? It did crack right near where it turns up into the ledge. I'm not sure if this is because of the corner created here or the difference in the thickness of the concrete and differential shrinkage. But, maybe I should have put a couple more bars in there crosswise. I'm not worried though, it has exceeded my expectations.

Both the edge and the surface came out way better than the last one I tried. I attribute this to the watery mix and more time spent vibrating it. I vibrated it with a saws-all without the blade on it and just moved around it and vibrated everywhere I could put it without dipping it in concrete. NOTE: Do not snip the wires holding the rebar up until you are 100% done vibrating or it will sink to the bottom and ultimately be useless as well as showing in the surface of your top.
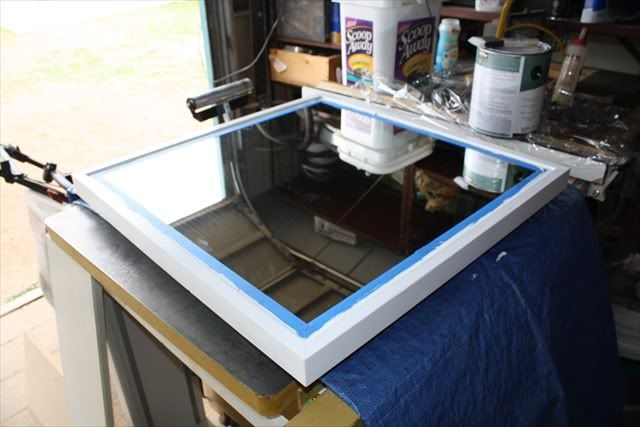
Nothing to do with the top but I found the oak mirror on clearance at Ikea and bought it to paint to match the casework. Ikea makes a white mirror in the same style but it is laminate (or what they call "foil" finish) and the white would not have matched. Plus this was $15 cheaper.
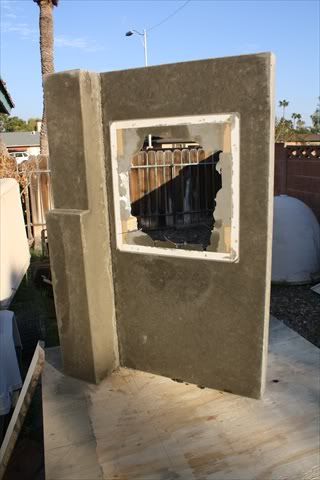
Turning it over is always the most nerve-wracking part. It came right out of the form. NOTE: be sure to think about how inside pieces like the sink hole are going to come out. They should disassemble so that you don't have to pry them out and risk cracking the top.
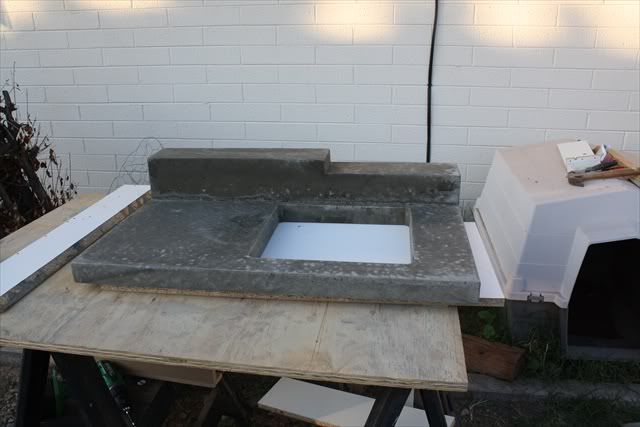
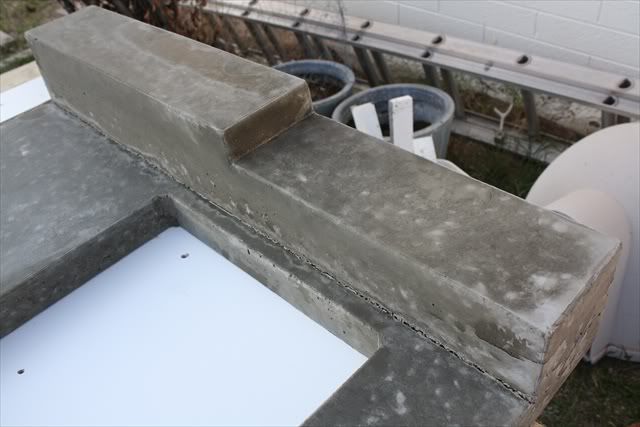
Luckily the crack does not appear to have affected it structurally as far as bathroom vanity duty goes but it does show up at the joint between the main surface and the vertical face.
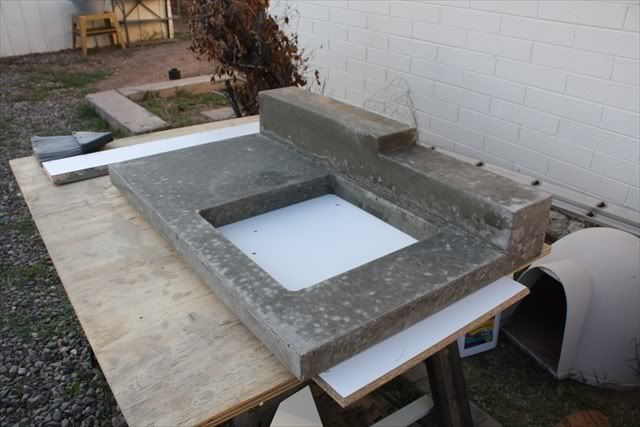
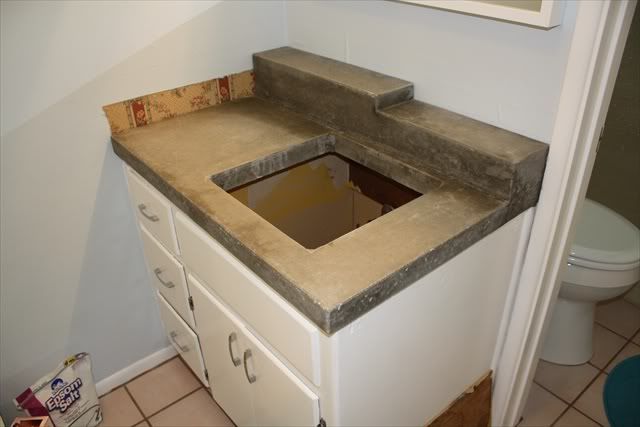
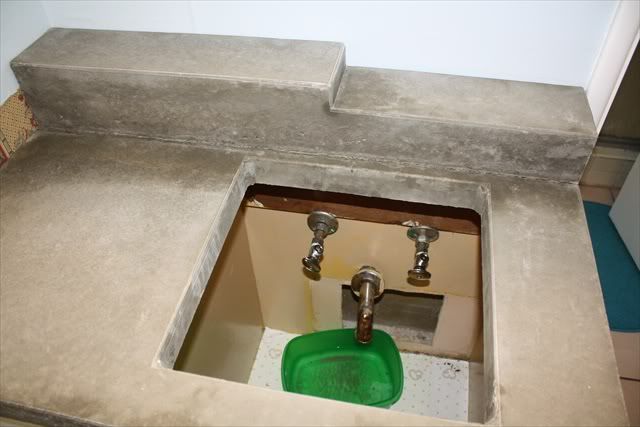
Looks good, right? But I made a mathematical mistake. The drop shown here is actually an inch to the right of where it was supposed to be. If I line up the corners as they should be, it exposes the hole for the plumbing. See the next picture.
Nobody but you and me know.
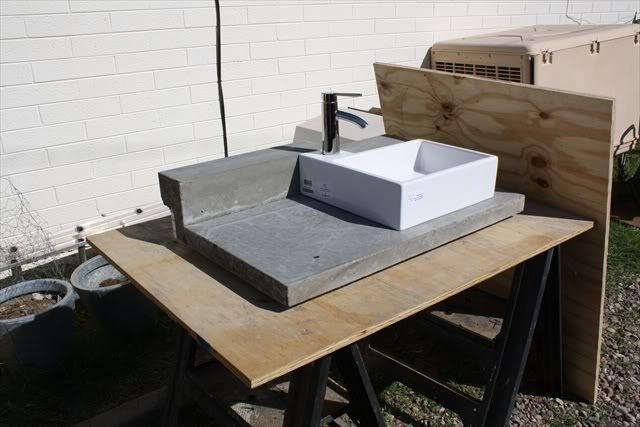
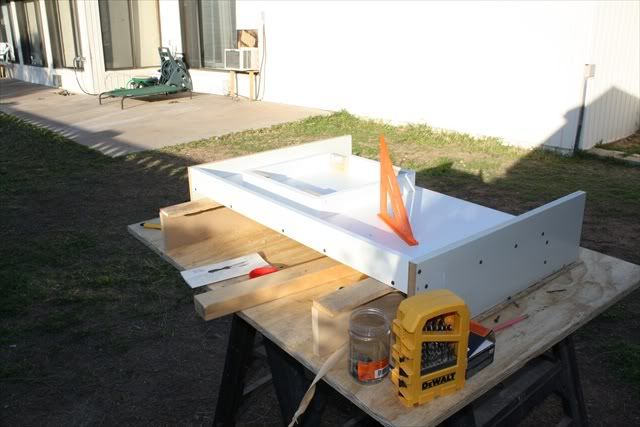
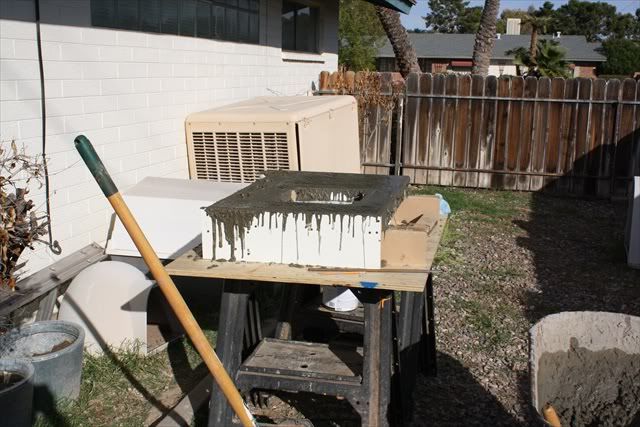
This is how I presented it to the GF on Valentines Day because I had only cast it the Tuesday before. I couldn't install it that quickly because it was too wet and with V-day being on a Sunday, that put a damper in my plan to install it while she was at work. The plywood you see off to the side has the mirror mounted on it so I stood her in front of it with her eyes closed while I lifted the plywood into place and held it up for the "unveiling".
It went over EXCELLENT.
I just forgot to have her take a picture before I set it back down. This is on the side of our house where she never goes. I just had to hope that for a week she wouldn't randomly wander over there and she didn't. I want to make note that I painted the sink cabinet to surprise her but then she helped with the rest of the painting.
GF and I were able to lift it into place. I estimate it's around 150#. I can lift it myself but just barely. I managed to lift it off the table and set it on the dolly to bring it in the house but it took the two of us to get it into place without any drama. The top is nominally 2" thick. I didn't grind this one like I did the last one...I took an 800 grit diamond hand sanding pad to it very quickly just to smooth it out...no more than a half hour on the whole thing. I didn't want it shiny.
Well, that's about it. Here are some parting pictures. Note that the joint between the top and the ledge appears really dark in these pictures but it doesn't look like that in person. I think it is because I had just sealed it for the last time. I haven't decided what to do with the crack in that joint.
The next thing I want to do is get rid of the peachy floor and I found an acceptable tile at the 'Po for a buck a foot. It is gray and looks great with the top. I will use gray grout so maybe I'll grout that corner. Or maybe I won't. I don't even notice it unless I'm looking at pictures and it's not in a kitchen where stuff could get gross in there. This is the top installed with sealer applied. All done. The GF is very pleased. MISSION ACCOMPLISHED.
Have I mentioned that I HATE PLUMBING?


